
Quick Start
This tutorial will walk you through creating a Restful API managing a Todo data with MySQL database, first we will learn about how to create a Plumier project, then we will learn how to create CRUD API using generic controller then finally we add authorization to protect the data.
Software Requirements#
To be able to follow this example you need some software installed in your computer.
- Node.js v10 or newer
- Any terminal app
- Any text editor, in this example using VSCode
- MySQL database
Init Project#
To get started we need to download TypeORM Rest API project starters from GitHub repository. In this example we will use Degit to download it.
Execute commands below in your terminal to download the project starter
Above command will download Degit locally then download Plumier TypeORM Rest API project starter into todo-api directory.
info
If you having problem executing npx you can manually install Degit globally
Then followed by executing Degit manually like below
Enter to the project directory by executing command below
Install package dependencies by executing command below
Project Starter File Structure#
Open the project directory using your favorite text editor or IDE, its recommended to use VSCode to easily follow this tutorial.
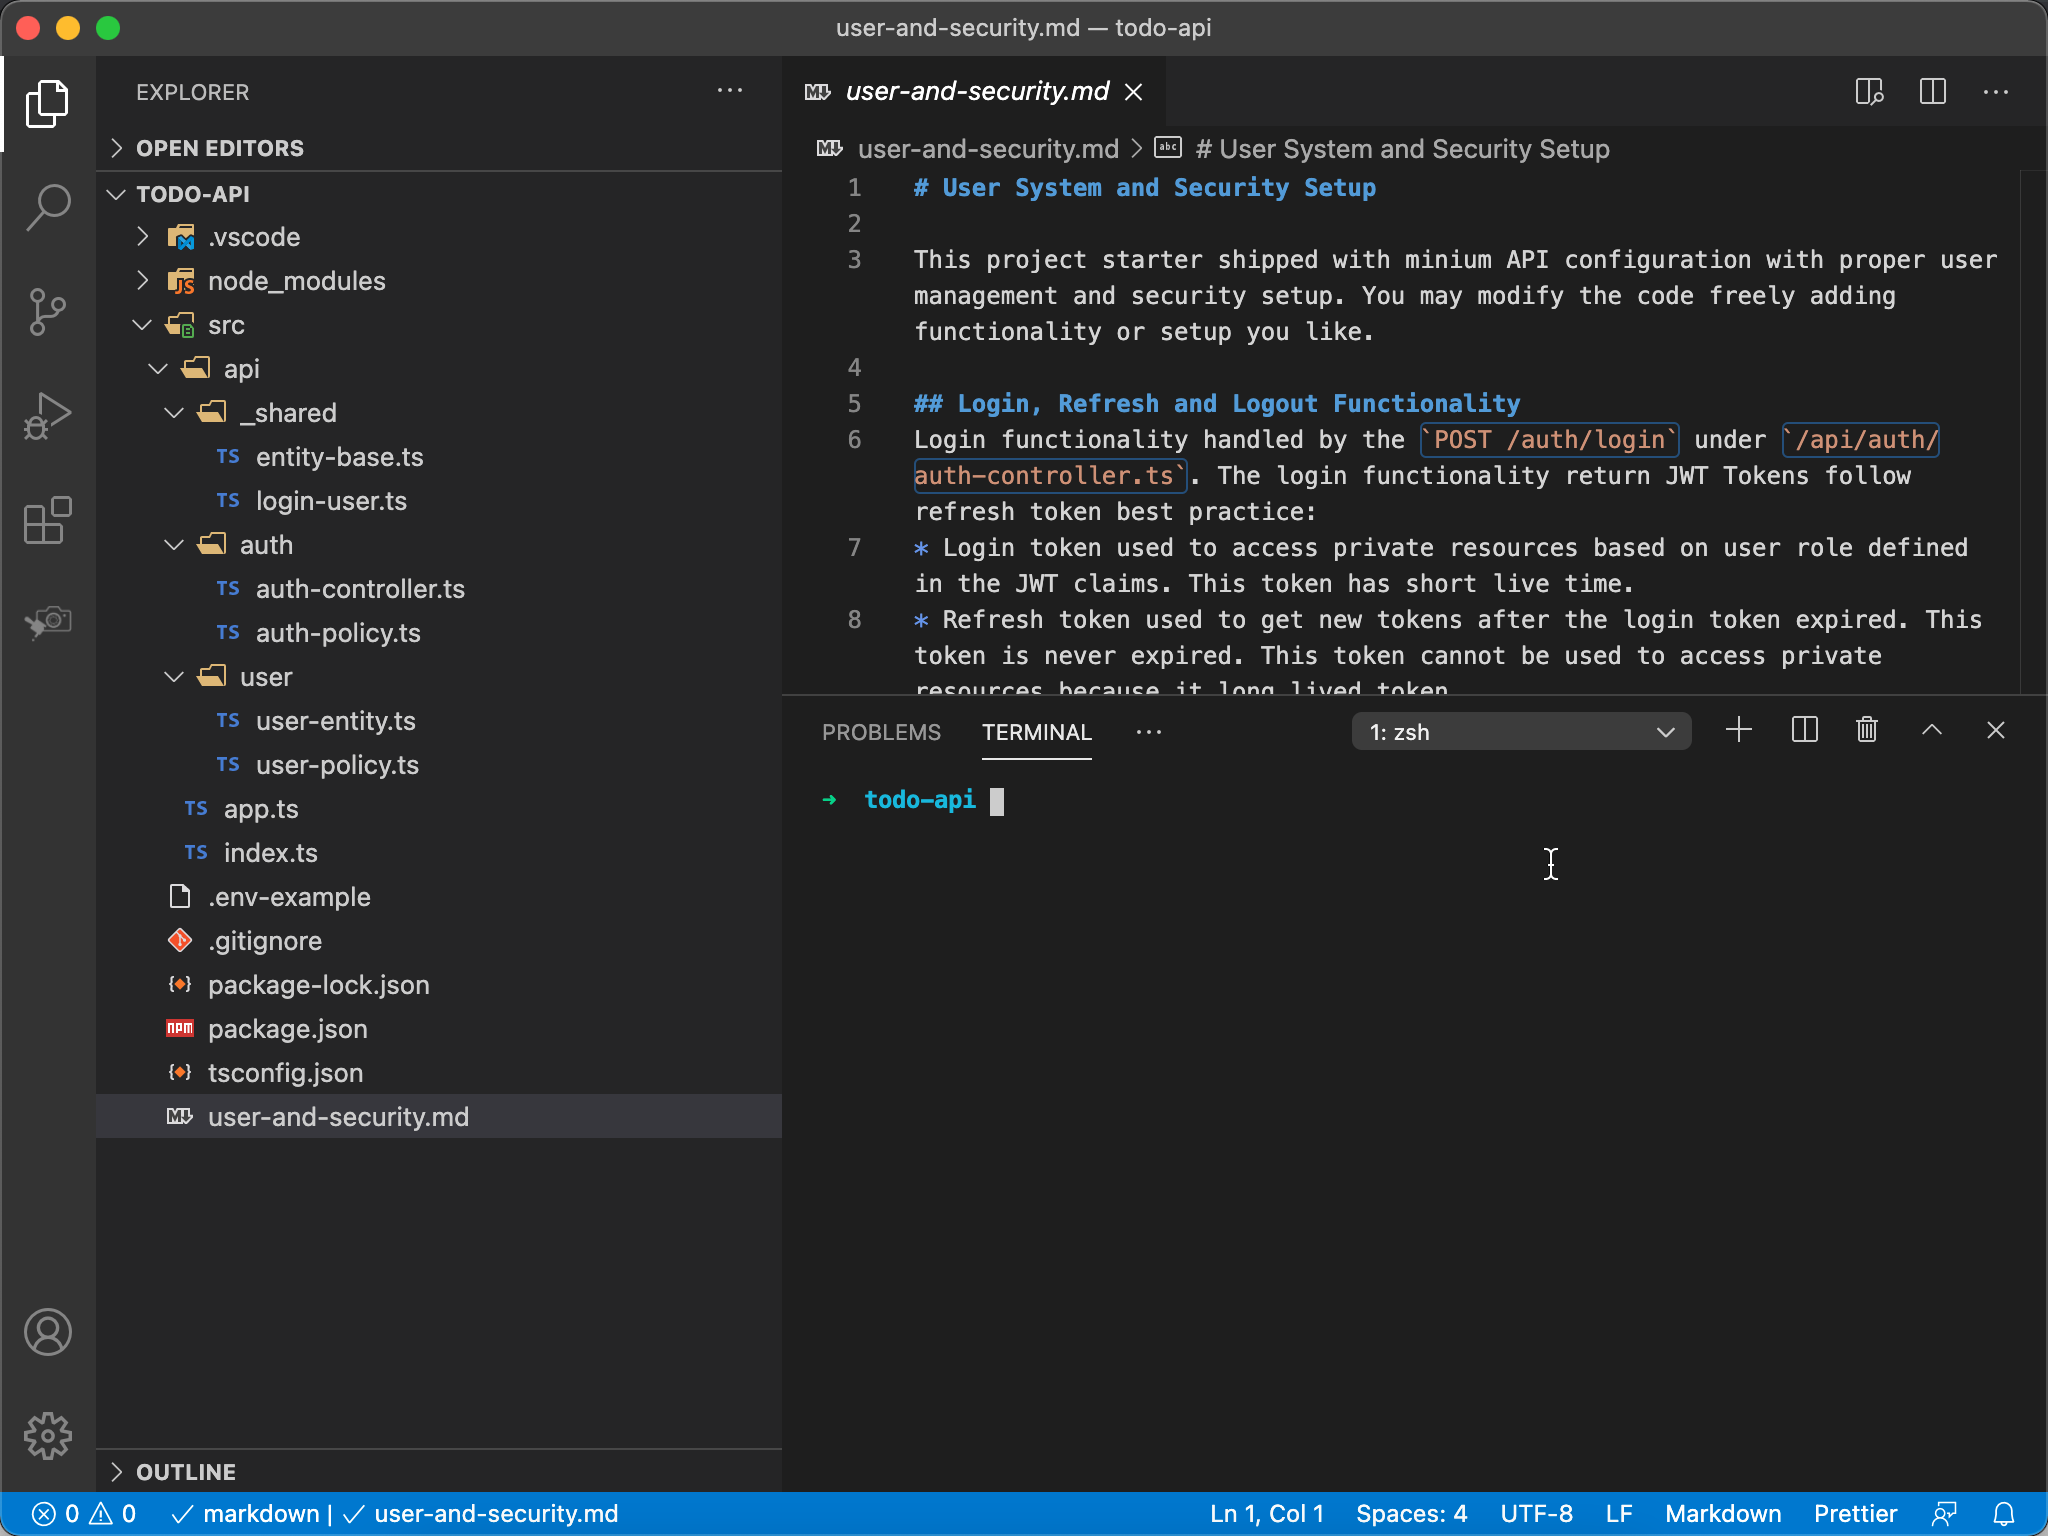
Project starter shipped with a user management and security functionality setup to secure the API. Spent some time to read the user-and-security.md doc to get understanding on how the user management and security setup works.
Project starter separate files per resource under src/api directory, each file must follow the naming convention.
- File ends with
-controller.tscontains codes for controller. - File ends with
-entity.tscontains entities or first class entity. - File ends with
-policy.tscontains authorization policy logic.
All file stays in _shared directory intended to be shared among the sibling directories.
You can change those behavior on Plumier application bootstrap on app.ts file.
Running The Project#
After all dependencies installed then it should be good to go, but before we start codding we need to provide required environment variable to make the project work correctly.
Rename the .env-example file into .env file, then execute command below to run the project
If you are follow step above correctly then above code will print message indicating it serve CRUD user API like below
Above is the route analysis report created by Plumier route generator system, it prints generated routes from controllers and generic controllers during the generation process, it may print issues on each route if occur.
If you see above routes, there are two resources currently hosted that is /auth and /users. Auth resource used to handle authentication its put on the api/auth/auth-controller.ts file. Its handled by a common controller, on the left of the route analysis report you can see the action handles the route AuthController.login(email, password).
The User resource is quite different, you can see the source code in api/users/user-entity.ts it uses first class entity with @genericController() decorator which means its handled by a generic controller. You can see also on the left of the route analysis report the action handled the routes uses TypeORMControllerGeneric.
Setup MySQL Connection#
By default project starter uses SQLite database driver, in this example we will install MySQL database and change the appropriate connection string on the .env file. Execute command below on your terminal app.
Above will install mysql driver and modify the package.json file, you may uninstall the sqlite3 driver by removing it on the package.json file, but its not necessary need to do on this example.
Create MySQL database named todo with any MySQL client and change the TypeORM configuration section on .env like below
Restart the API which previously running by pressing ctl+c on the terminal app then re-run the command below to restart it.
Add Root Path#
On this step we will add API version by adding root path /api/v1 for all generated routes. To do that we will need to configure the Plumier application bootstrap.
Open the src/app.ts file and locate the WebApiFacility add configuration rootPath: "/api/v1" on the parameter, so the code will be like below.
Save the file and see the log on terminal app will show our change like below.
Above showing that now all the routes path started with /api/v1 with all the routes generated.
Testing API Using Swagger#
The project starter comes with swagger ui under http://localhost:8000/swagger we can use it to test the User API provided by the project starter.
Navigate to the POST /api/v1/users and provide the email, name and password like below
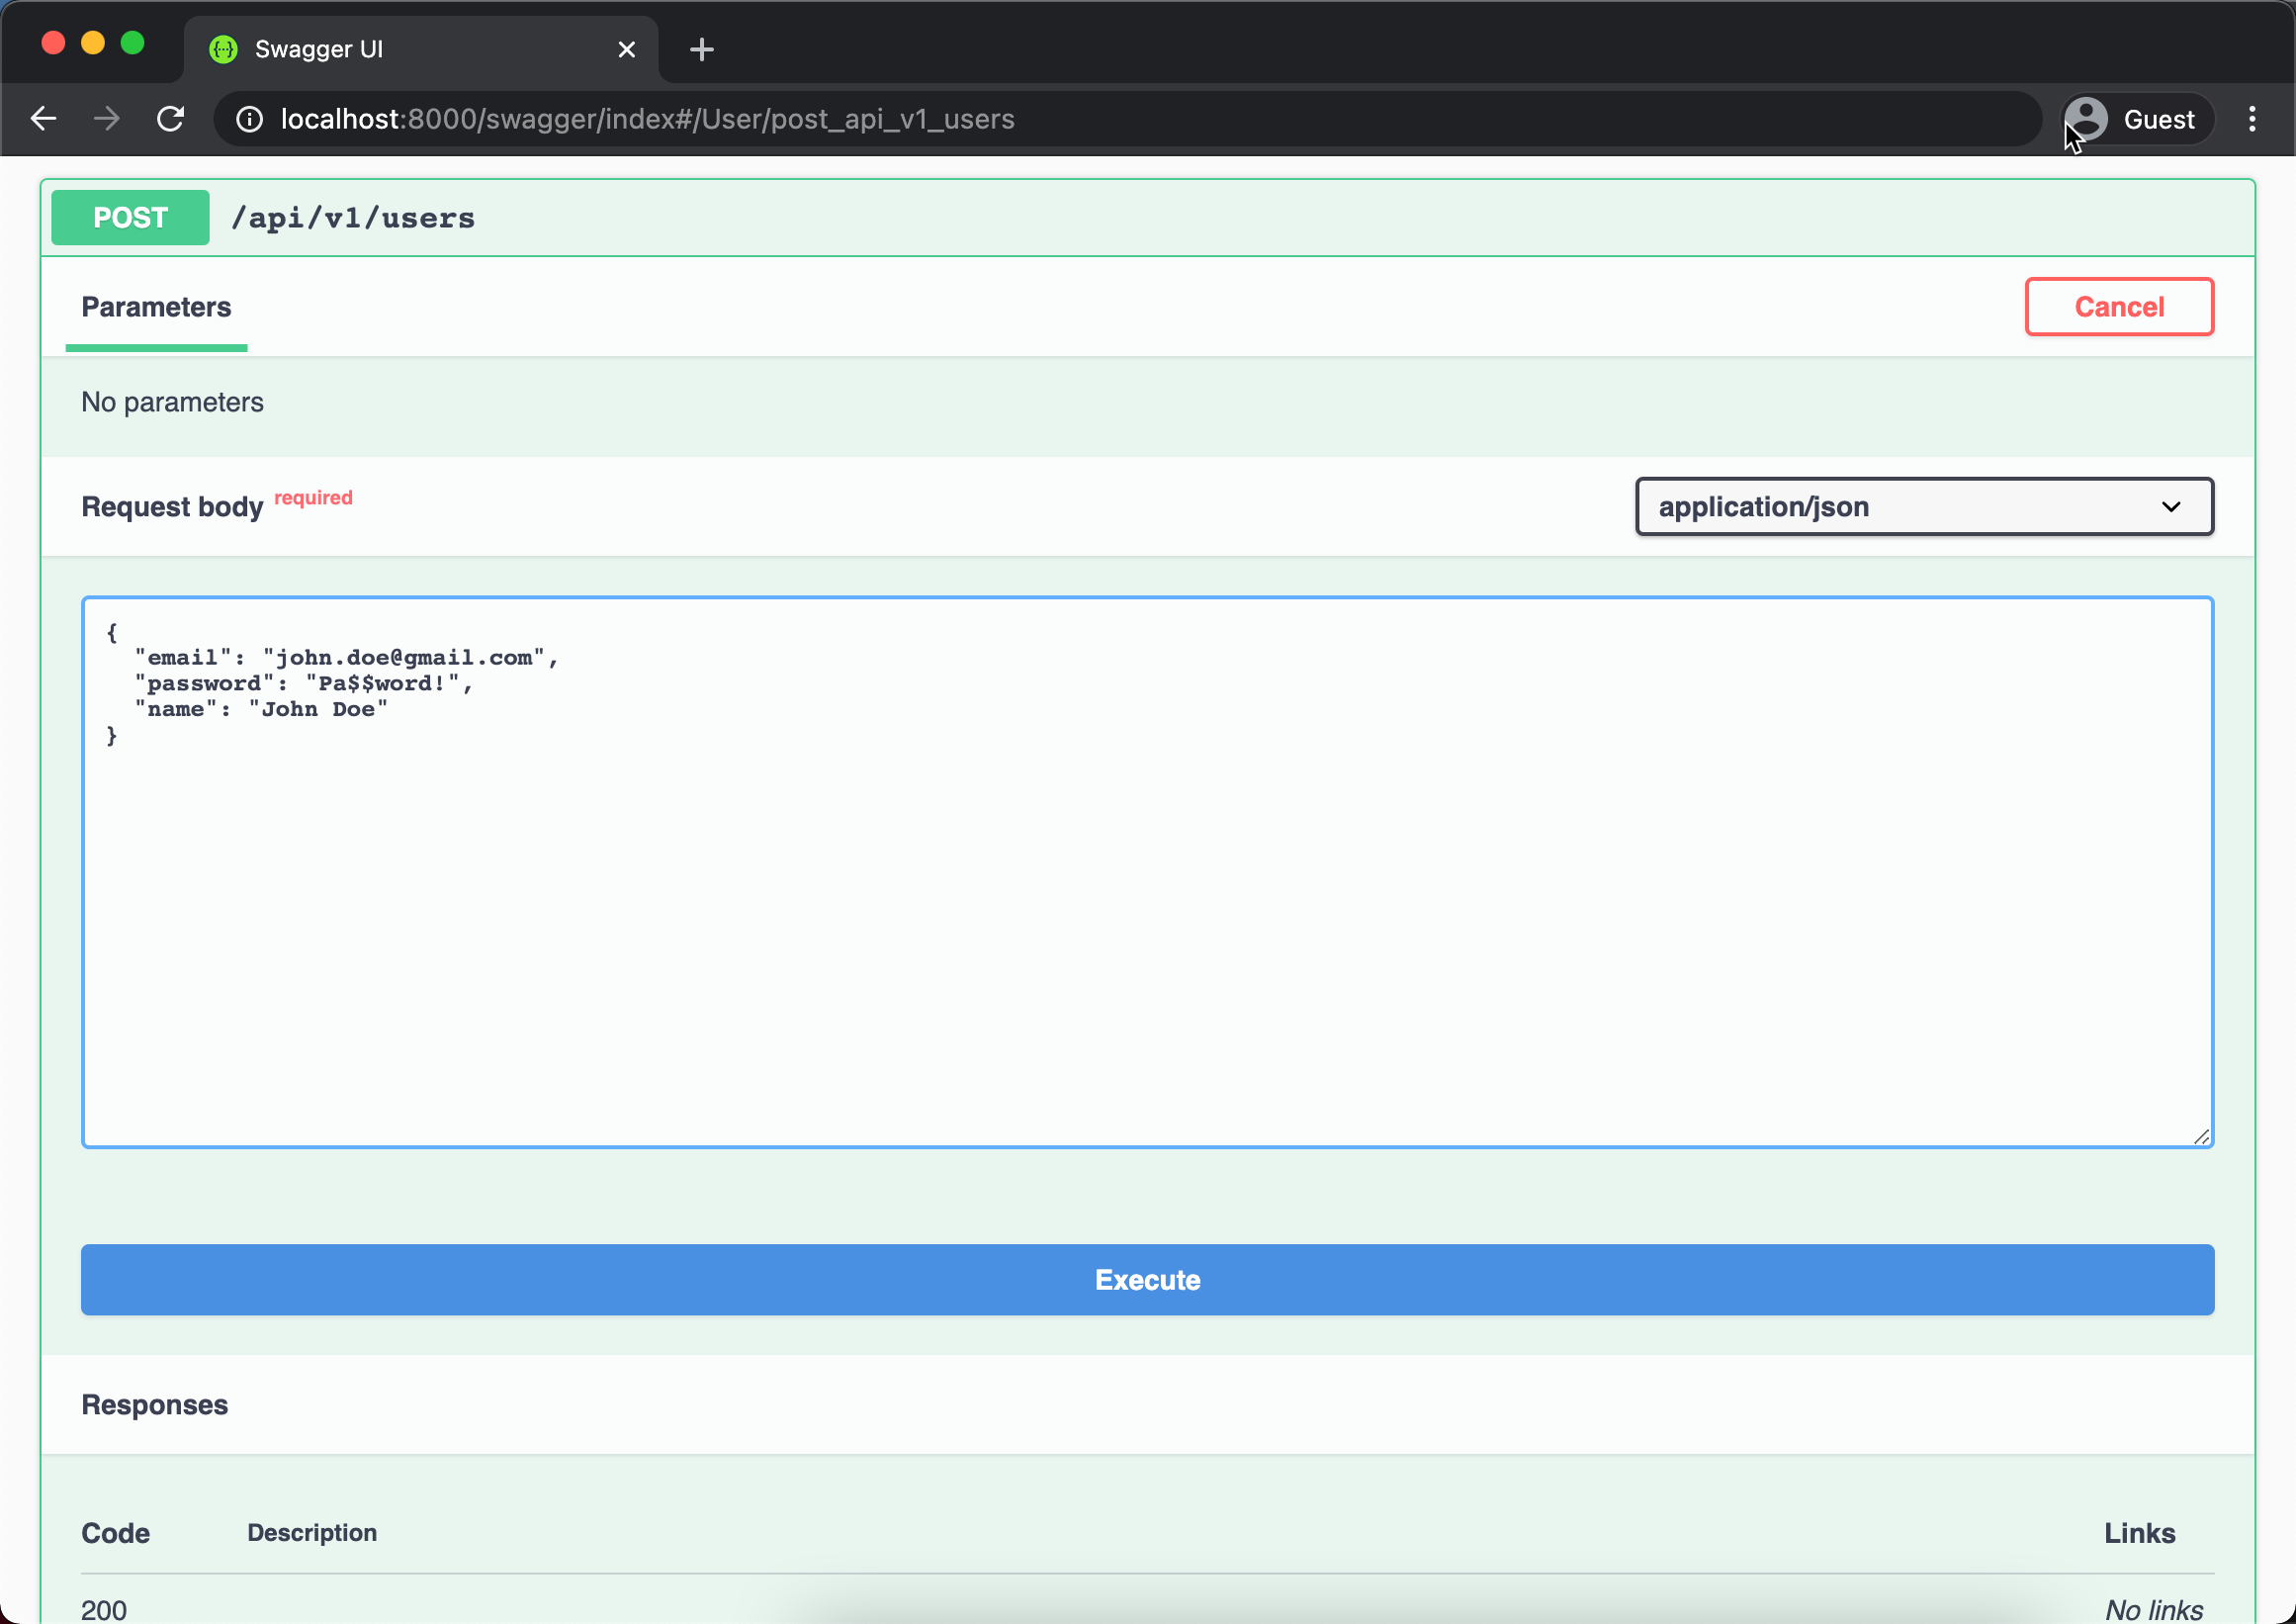
Above process will return the ID of the inserted record { id: 1 }. Next we can try the login function by navigating to the POST /auth/login endpoint and provide email and password that we entered previously.
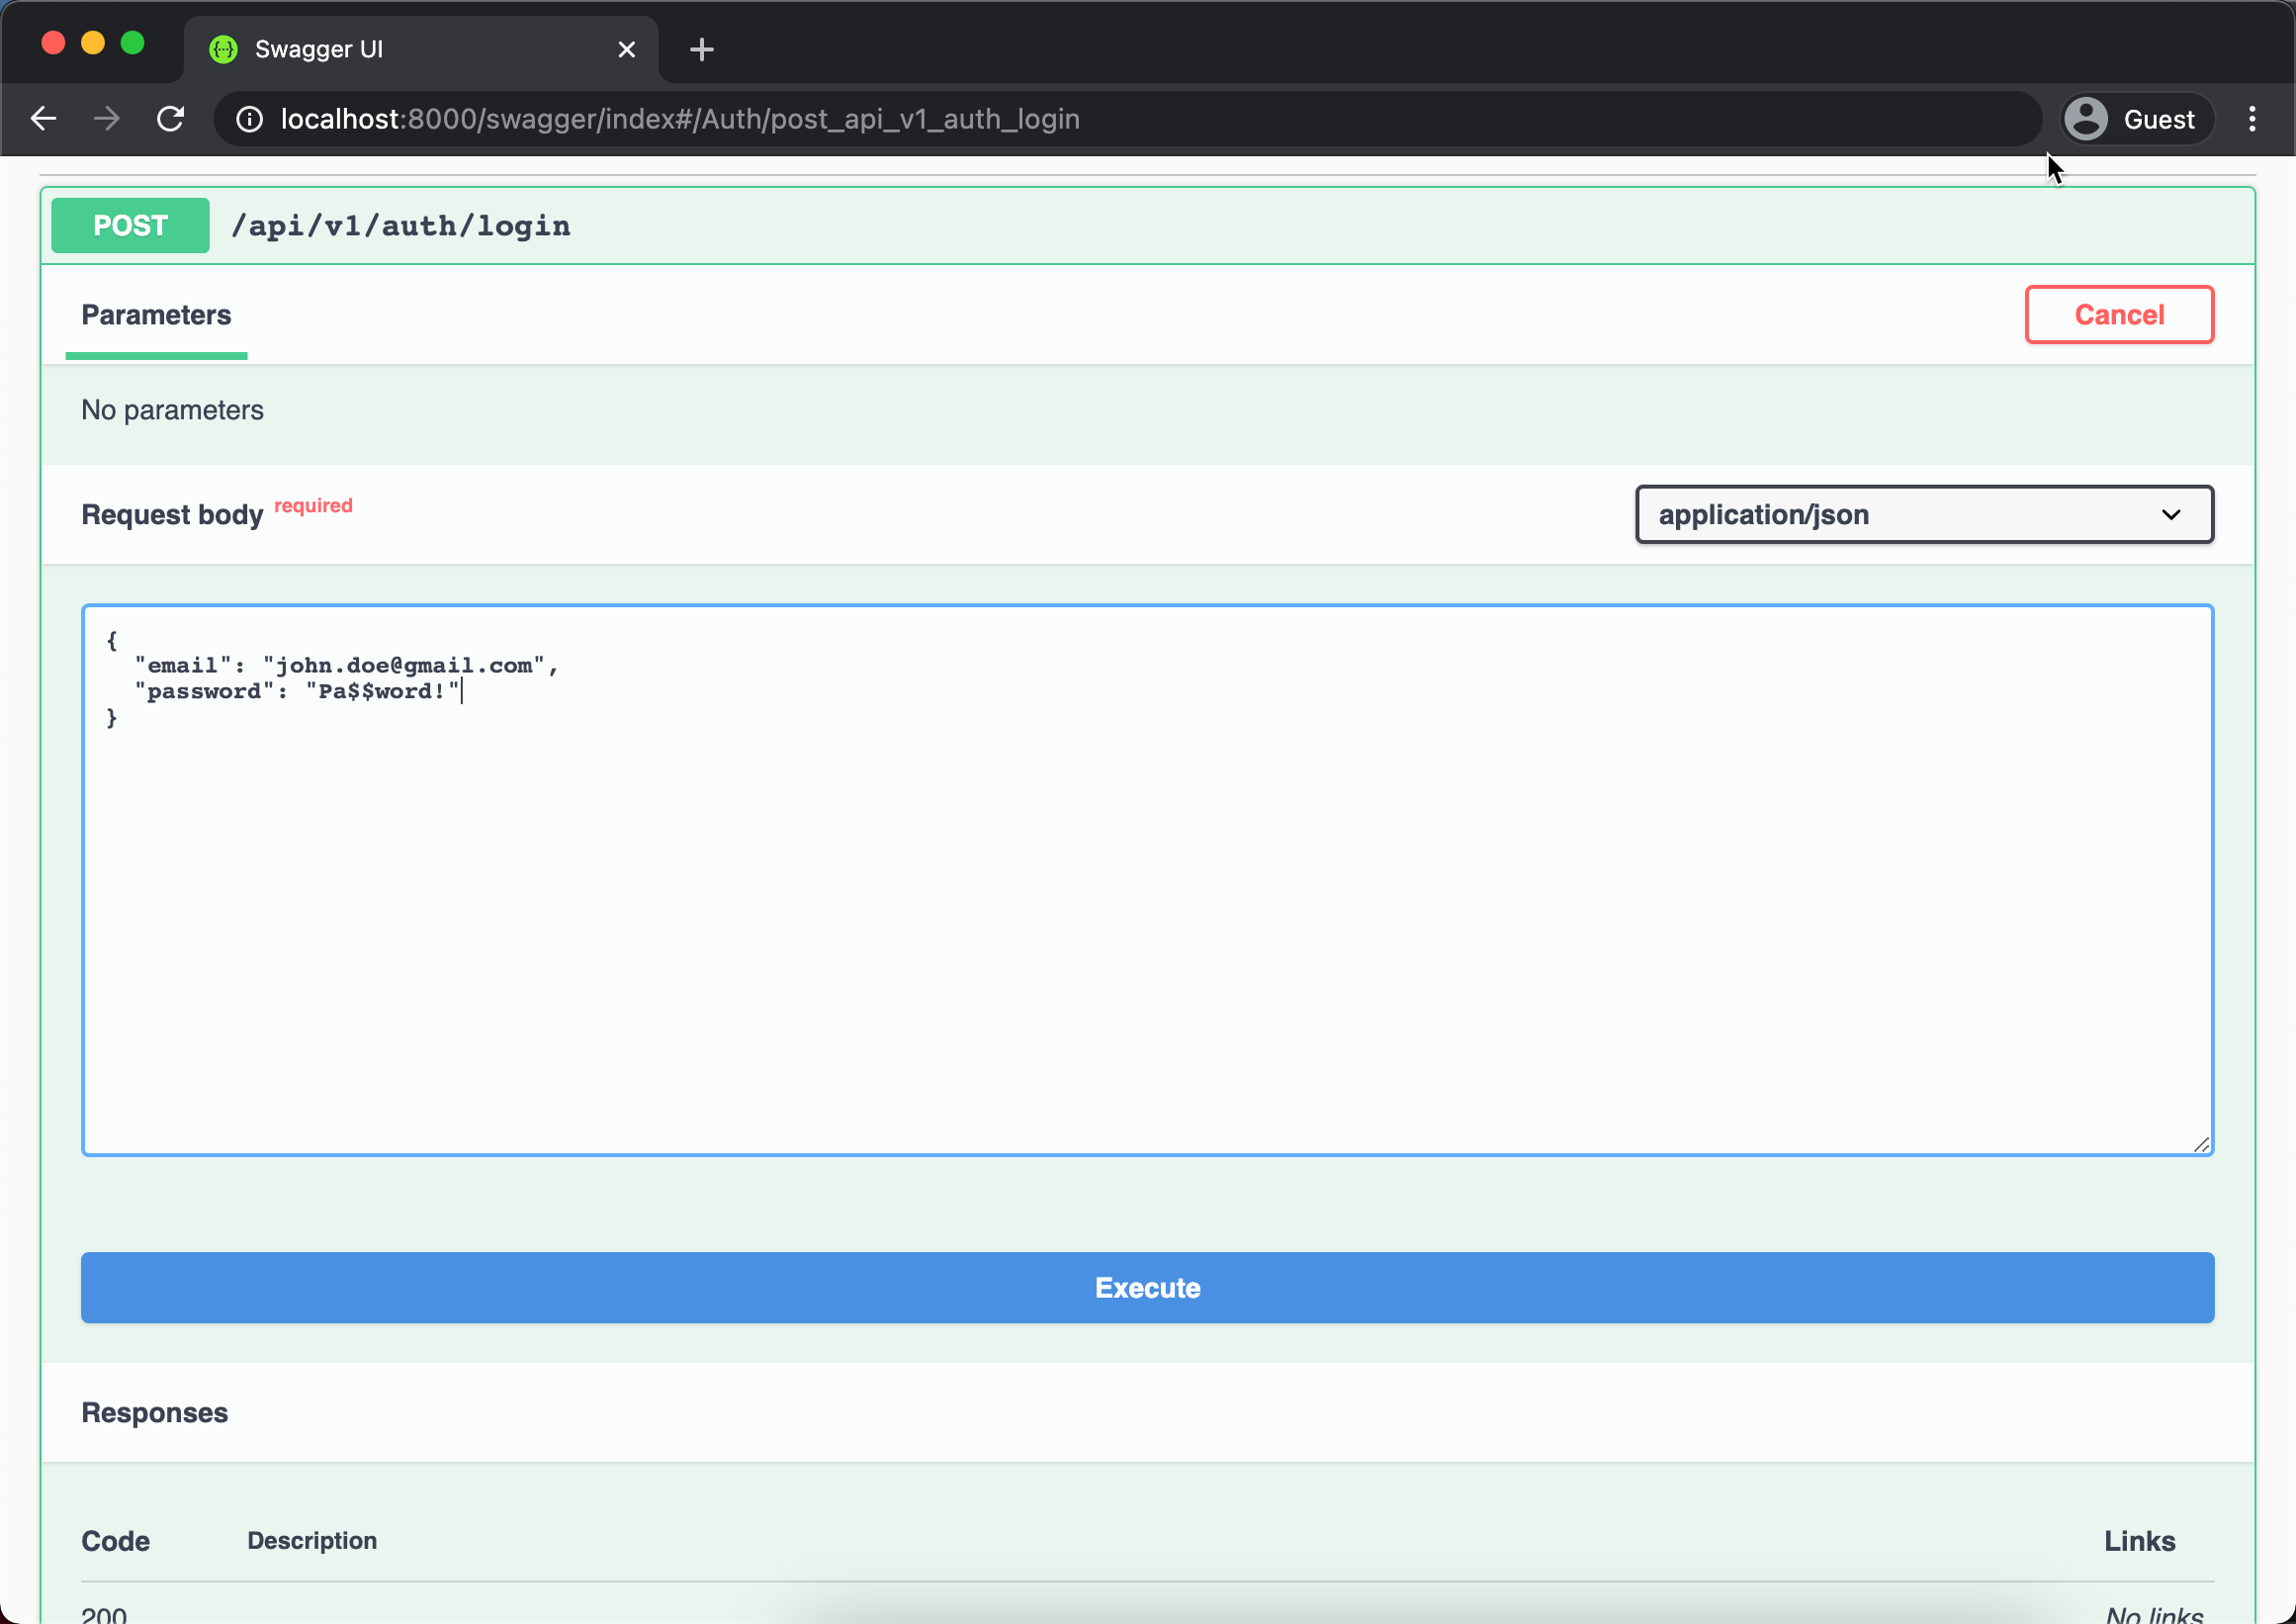
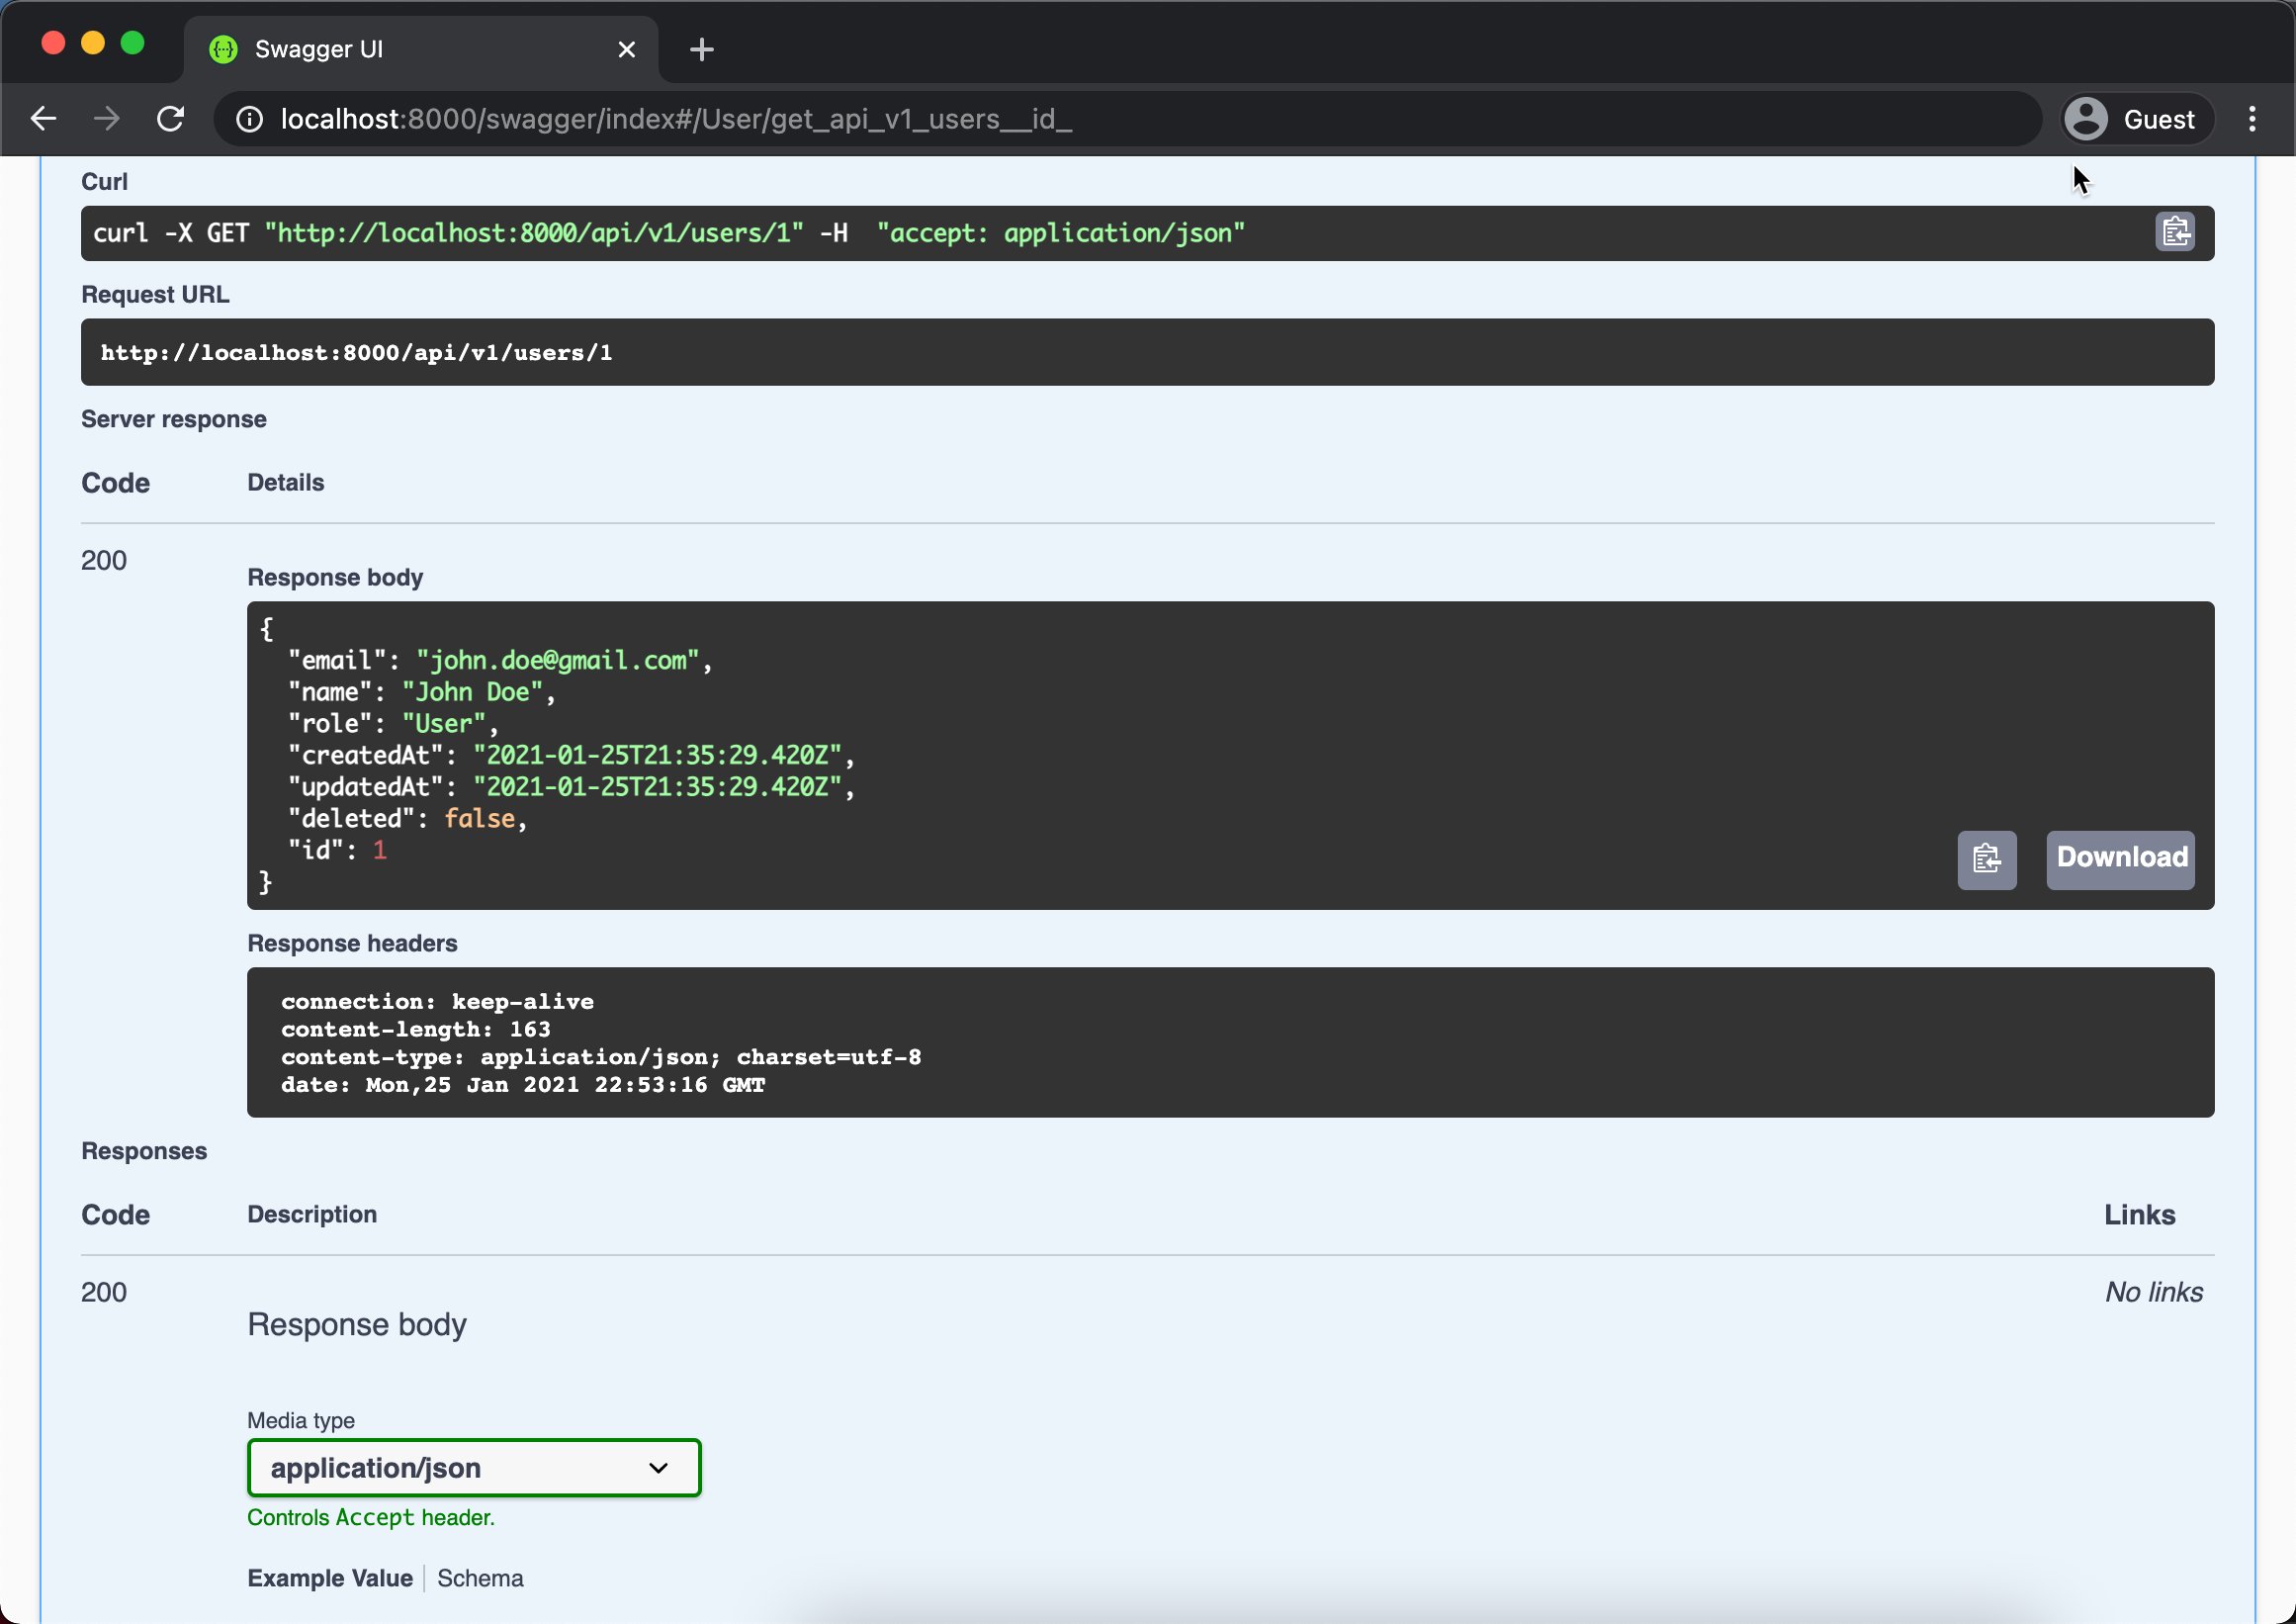
Above will returned two JWT tokens { token, refreshToken } and also writes the Authorization cookie to the browser. Now you are login to the system, try play around accessing private resource such as GET /api/v1/users/{id} like below.
Add Todo API#
Now we're ready for codding, we will add Todo resource to the application using a generic controller. Create new directory under /src/api named todo and create new file named todo-entity.ts and copy paste code below.
If you are a TypeORM user you may a bit familiar with above code. Above is a first class entity, its control most API behavior from the entity itself.
@genericController() will inform Plumier that this entity handled by a generic controller. Provide simple configuration to set that the Todo data only can be modified (PUT, PATCH, DELETE) by the ResourceOwner (user created the todo) and by the Admin of the API.
We apply validation on the message property, tells Plumier that this field is required. Plumier will automatically response 422 when this field value does not provided.
We add @authorize.readonly() on the user property because its value automatically populated using preSave request hook.
On preSave request hook we bind the current login user into the user parameter and populate the user property value. This setUser method will be executed before the entity saved into the database. Note that the post parameter provided means this method only executed on POST method, other than that it will never executed.
Save the file and see if the route analysis report showing result like below.
Now we ready to test our Todo API, go back to swagger ui and find out the POST /api/v1/todos endpoint and execute with data like below.
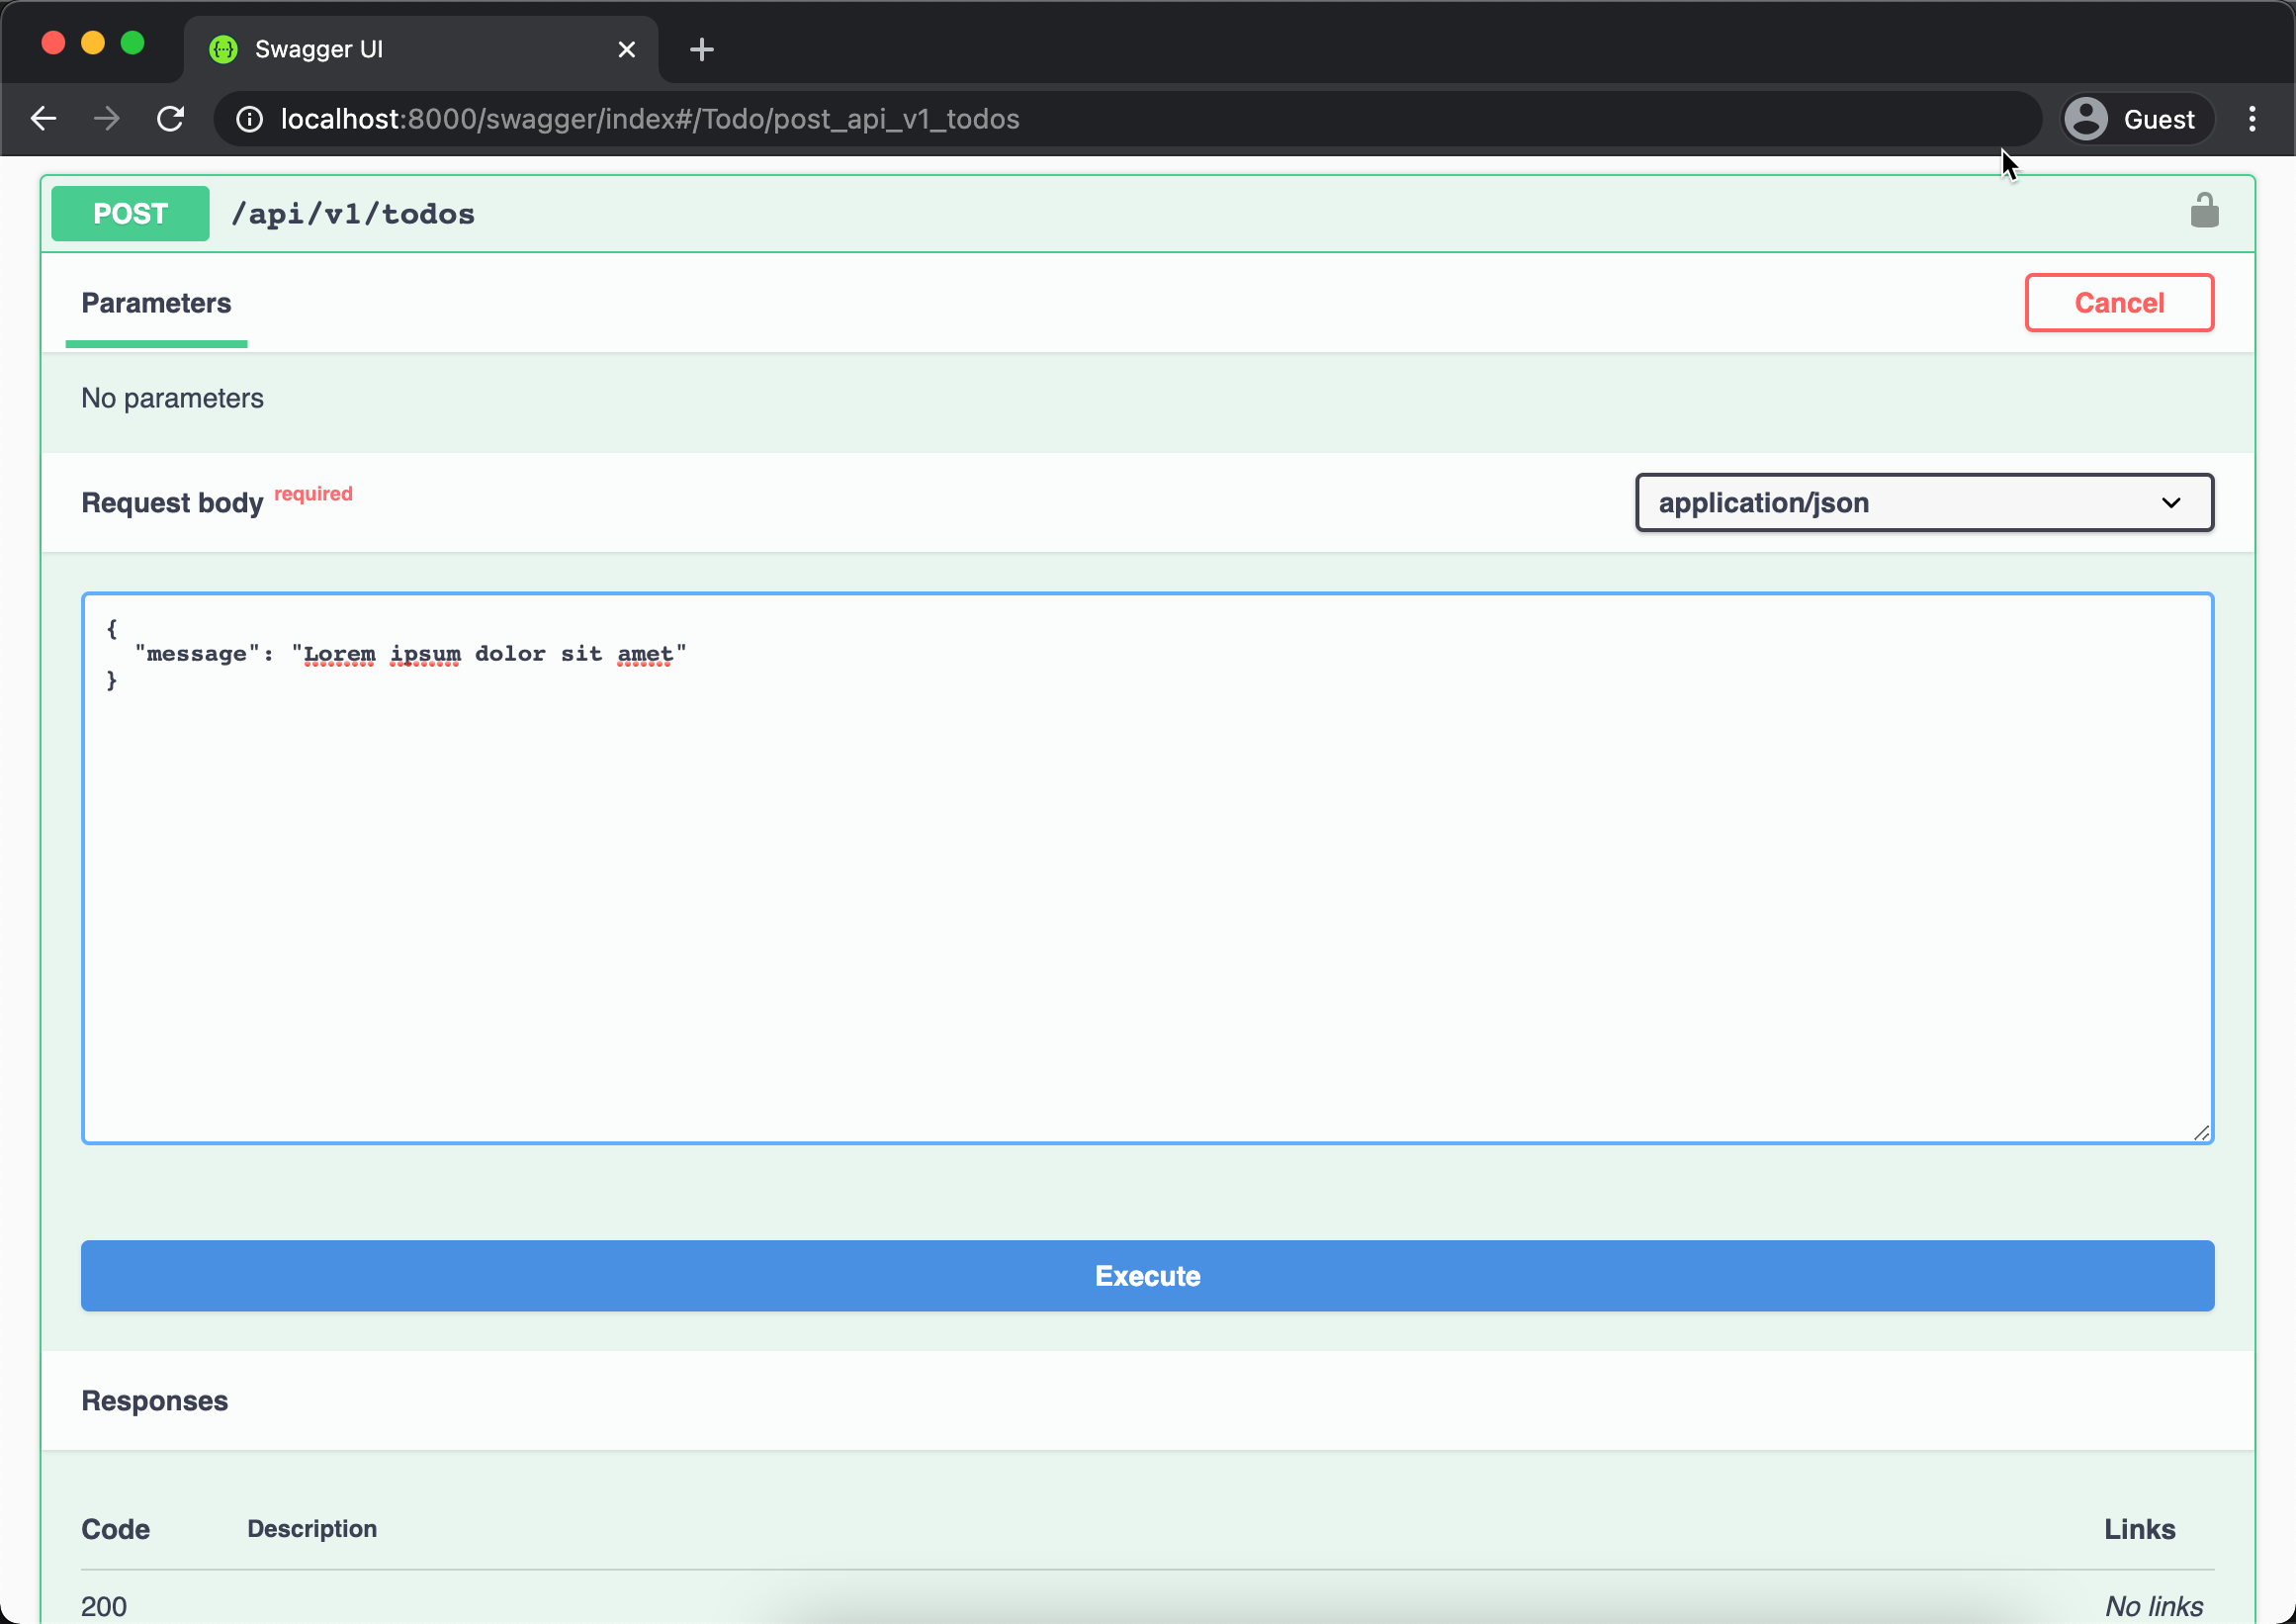
Above will return the new inserted record ID { id: 1 } indicate that our API already work properly. You can play around with other API such as GET /api/v1/todos/{id} like below.
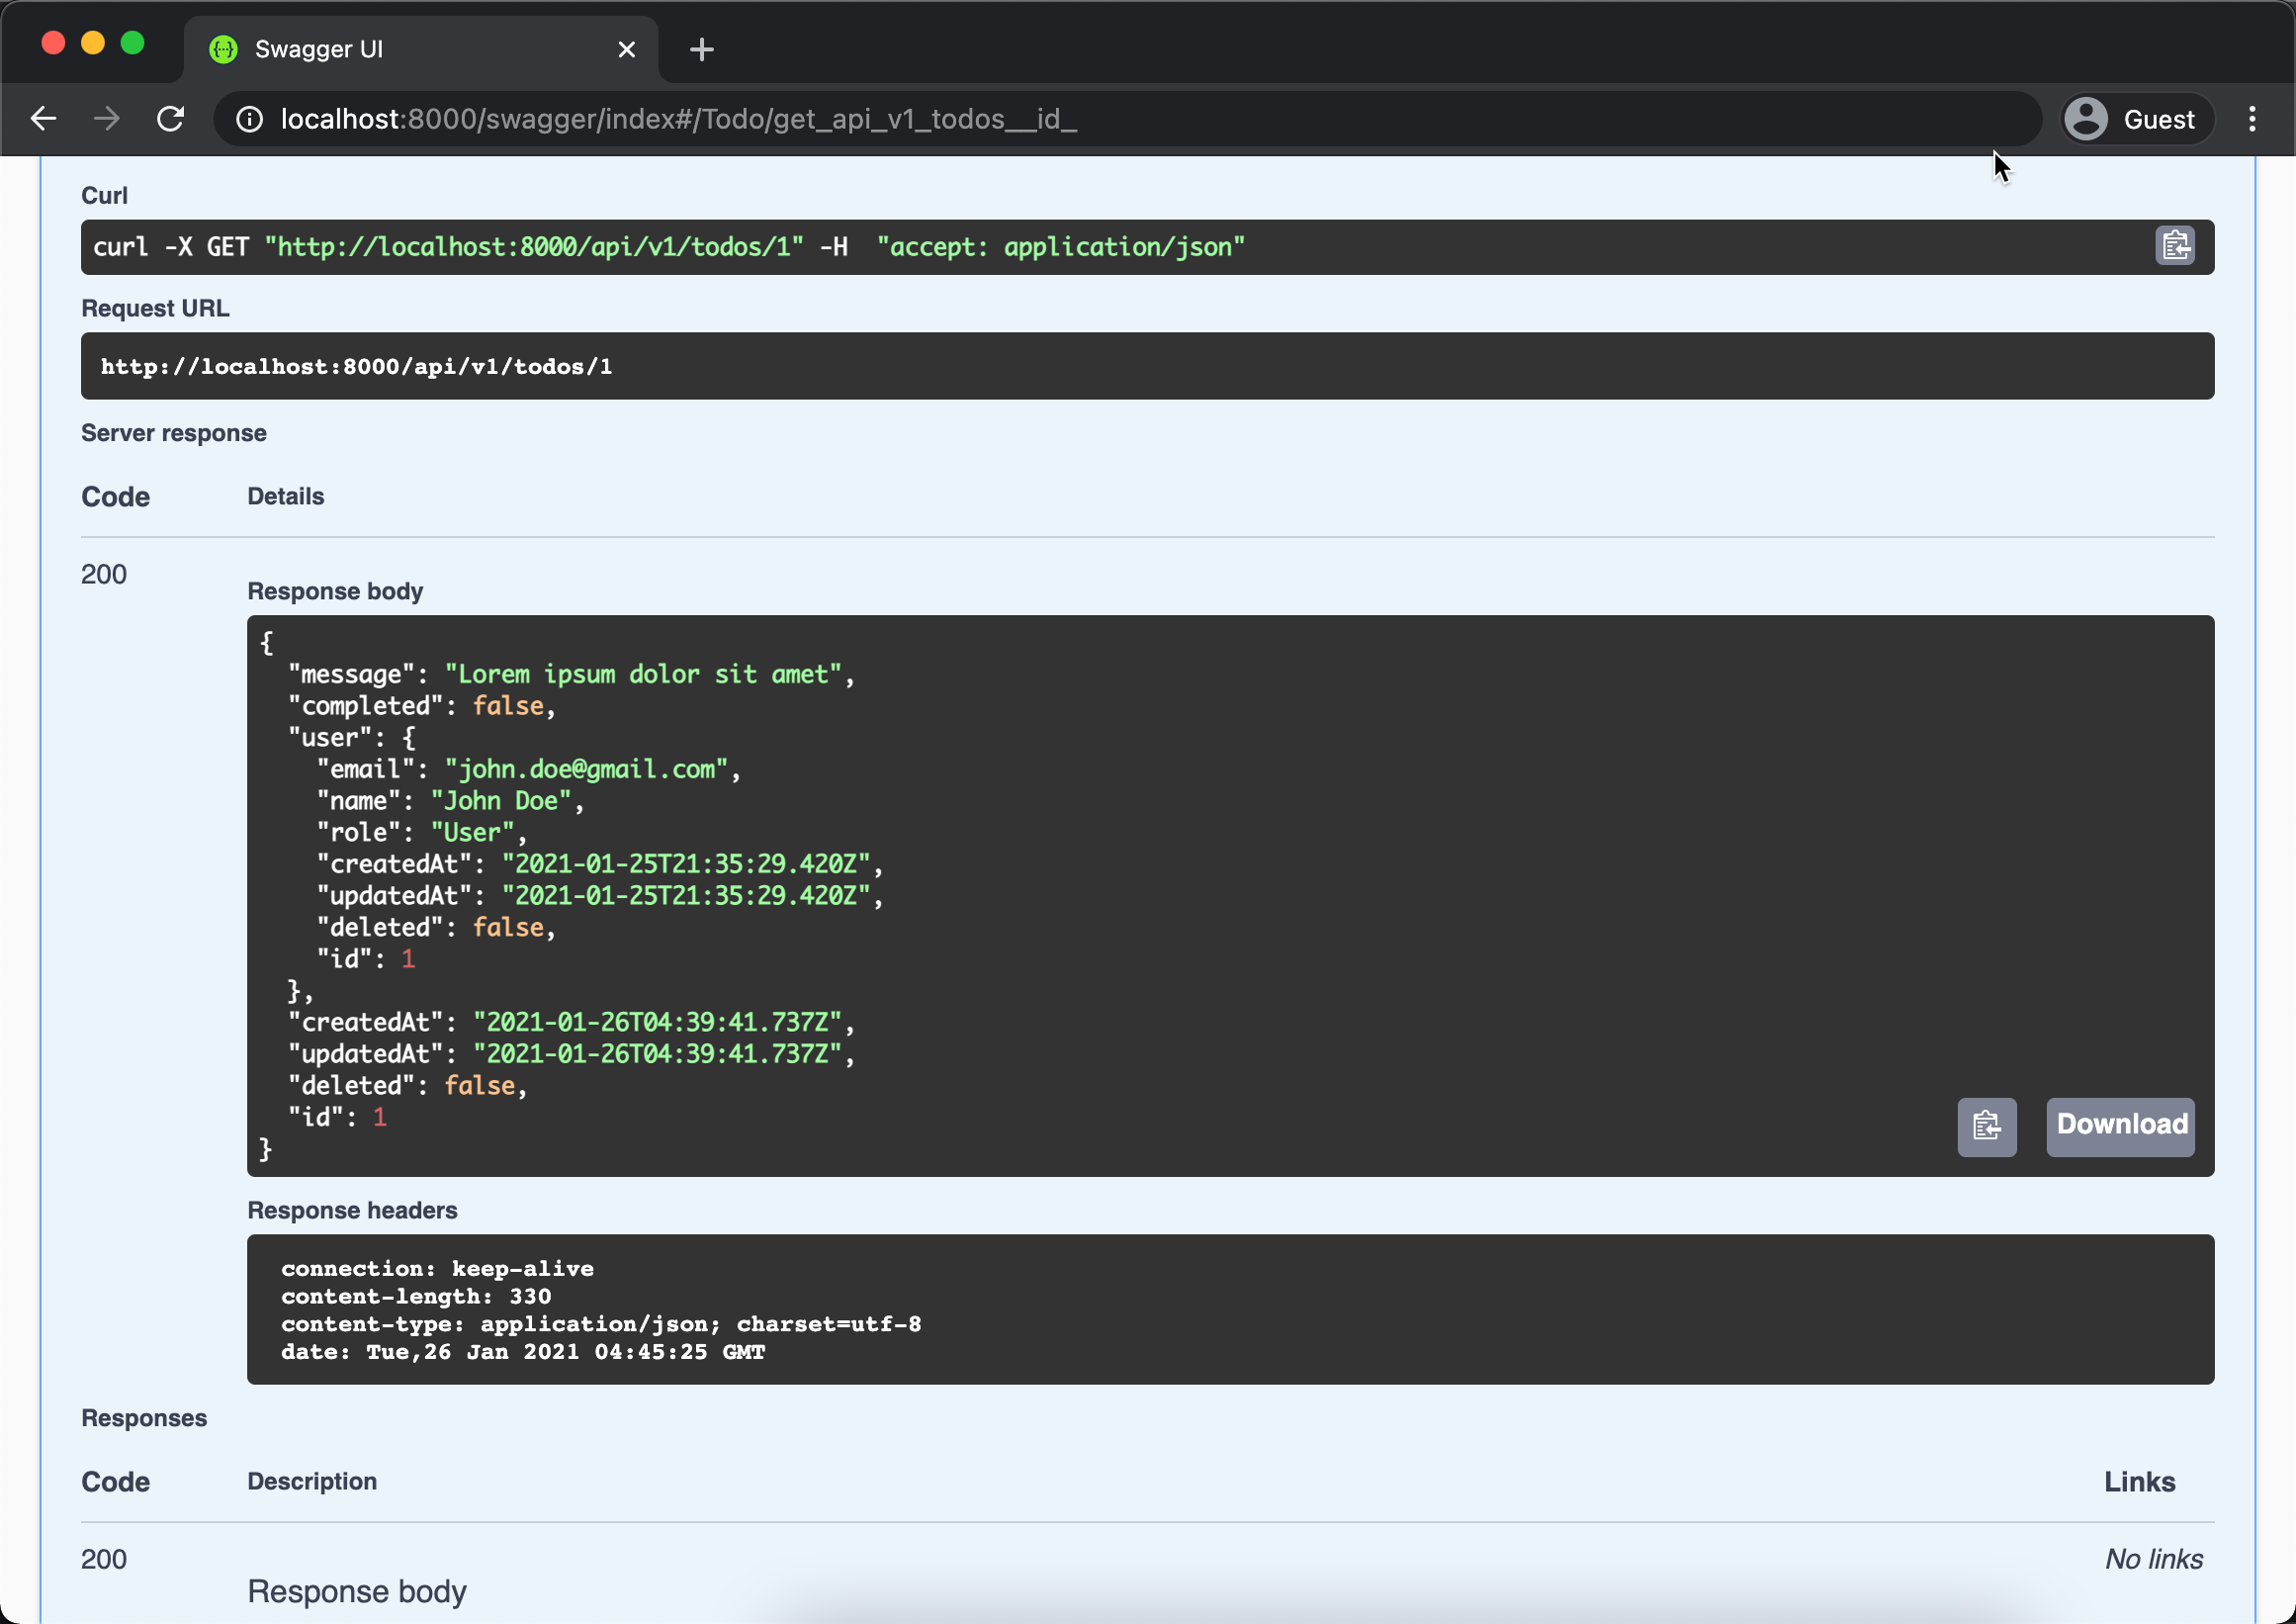
Like you see above the user property of the Todo entity populated properly with the current login user. Next step we will secure our API so it only can be modify and deleted by the owner of the Todo.
Todo ResourceOwner Definition#
If you look at the /api/user/user-policy.ts file you will see how the ResourceOwner auth policy defined using entityPolicy. Entity policy works only to specific entity defined, its logical since definition of ResourceOwner may vary among entity based on the data structure. In this step will will created definition for ResourceOwner specifically for Todo entity.
Create a new file under /api/todo named todo-policy.ts and copy paste code below.
Above is the definition of ResourceOwner for Todo and provide a callback function how we define the owner of the Todo data like this ctx.user.userId === todo.user.id. This callback function will be called several time:
- During route authorization evaluation, to check if user authorized to access the route.
- During parameter authorization evaluation, to check if user authorized to set entity property.
- During response authorization evaluation, to remove some property that not authorized to a user.
Based on above behavior, its necessary to cache the query to speed up the process.
The callback received two parameters the first is the Authorization Context and the second is the ID of the evaluated Todo data. The callback returned true to authorized the user other wise false.
Now its time to test our auth policy, create another user using POST /api/v1/users API then login using POST /api/v1/login. Then try to delete our last inserted todo using the DELETE /api/v1/todos/{id} like below.

Picture above showing that our auth policy successfully secured the API by returning 401.
Nested API for Todo Comment#
We are successfully created an API using a generic controller, next we will learn how to create nested API using nested generic controller.
Nested API is a restful best practice to provide parent - children API, usually used nested endpoint like /parents/{parentId}/children.
In this example we will form Todo -> Comment as a parent - children relation, since each Todo can have their own notes. We will provide an API using nested generic controller to do that.
First we need to define the Comment entity, create a directory under src/api named todo-comment, then create a file named comment-entity.ts then copy paste code below.
Above is the Comment entity, the todo entity set to readonly, since its a reverse property to the parent entity it will populated automatically by the generic controller.
You may notice that it doesn't have @genericController() decorator. The most important thing is, nested generic controller require an array relation (one to many or many to many) than we can create the API by providing @genericController() on the relation property.
Above showing that we modify our current Todo entity by adding a one to many relation to the comment entity. You can see also we add @genericController() decorator above the comments property means its will be handled by a nested generic controller.
info
Decorating one to many property with @genericController() may make the code less cleaner, since the controller configuration stays in todo directory instead of the todo-comment directory. Alternatively you can put @genericController() above the inverse property of the Comment entity which is user property.
Next you can save the file and see the route analysis report like below.
You see that the routes now handled by TypeORMNestedControllerGeneric and the endpoints is /api/v1/todos/:pid/comments. We used the Todo Comment API endpoints by providing the Todo ID like this /api/v1/todos/1/comments.
We can test our new API using swagger like the picture below.
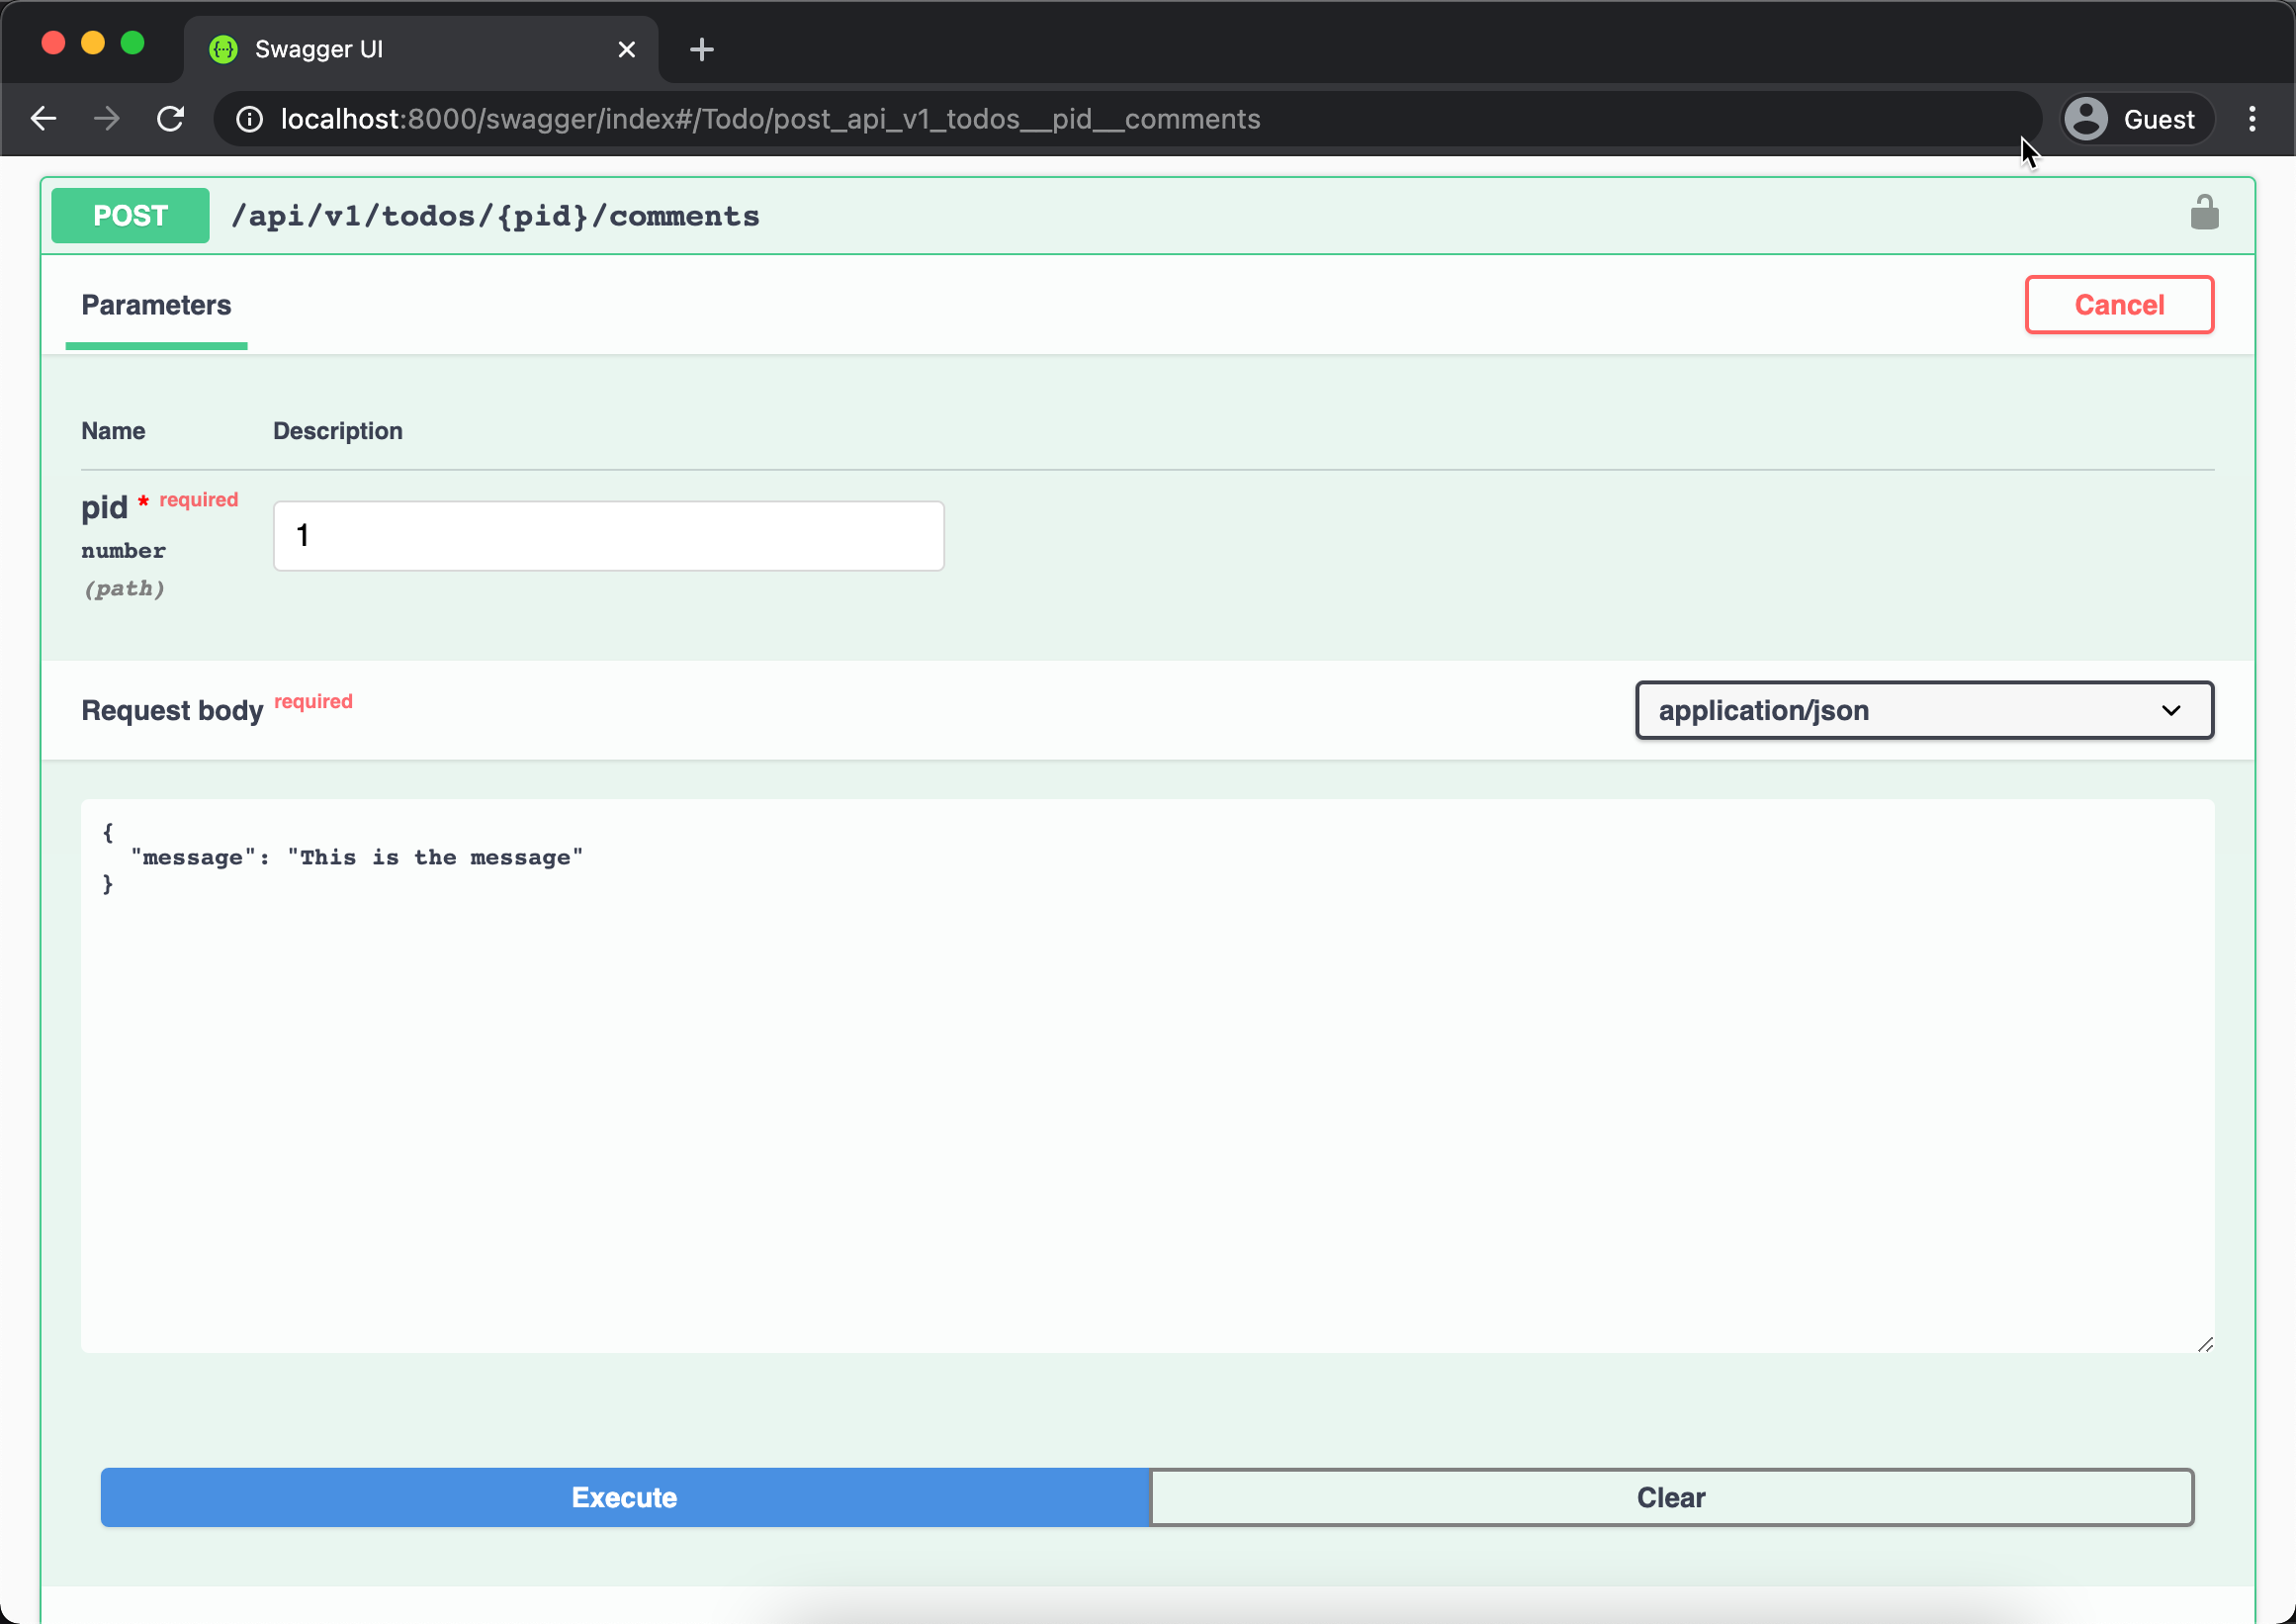
When successfully added a comment, try adding more comments to the Todo and then show all the inserted comments using GET /api/v1/todos/1/comments like picture below.
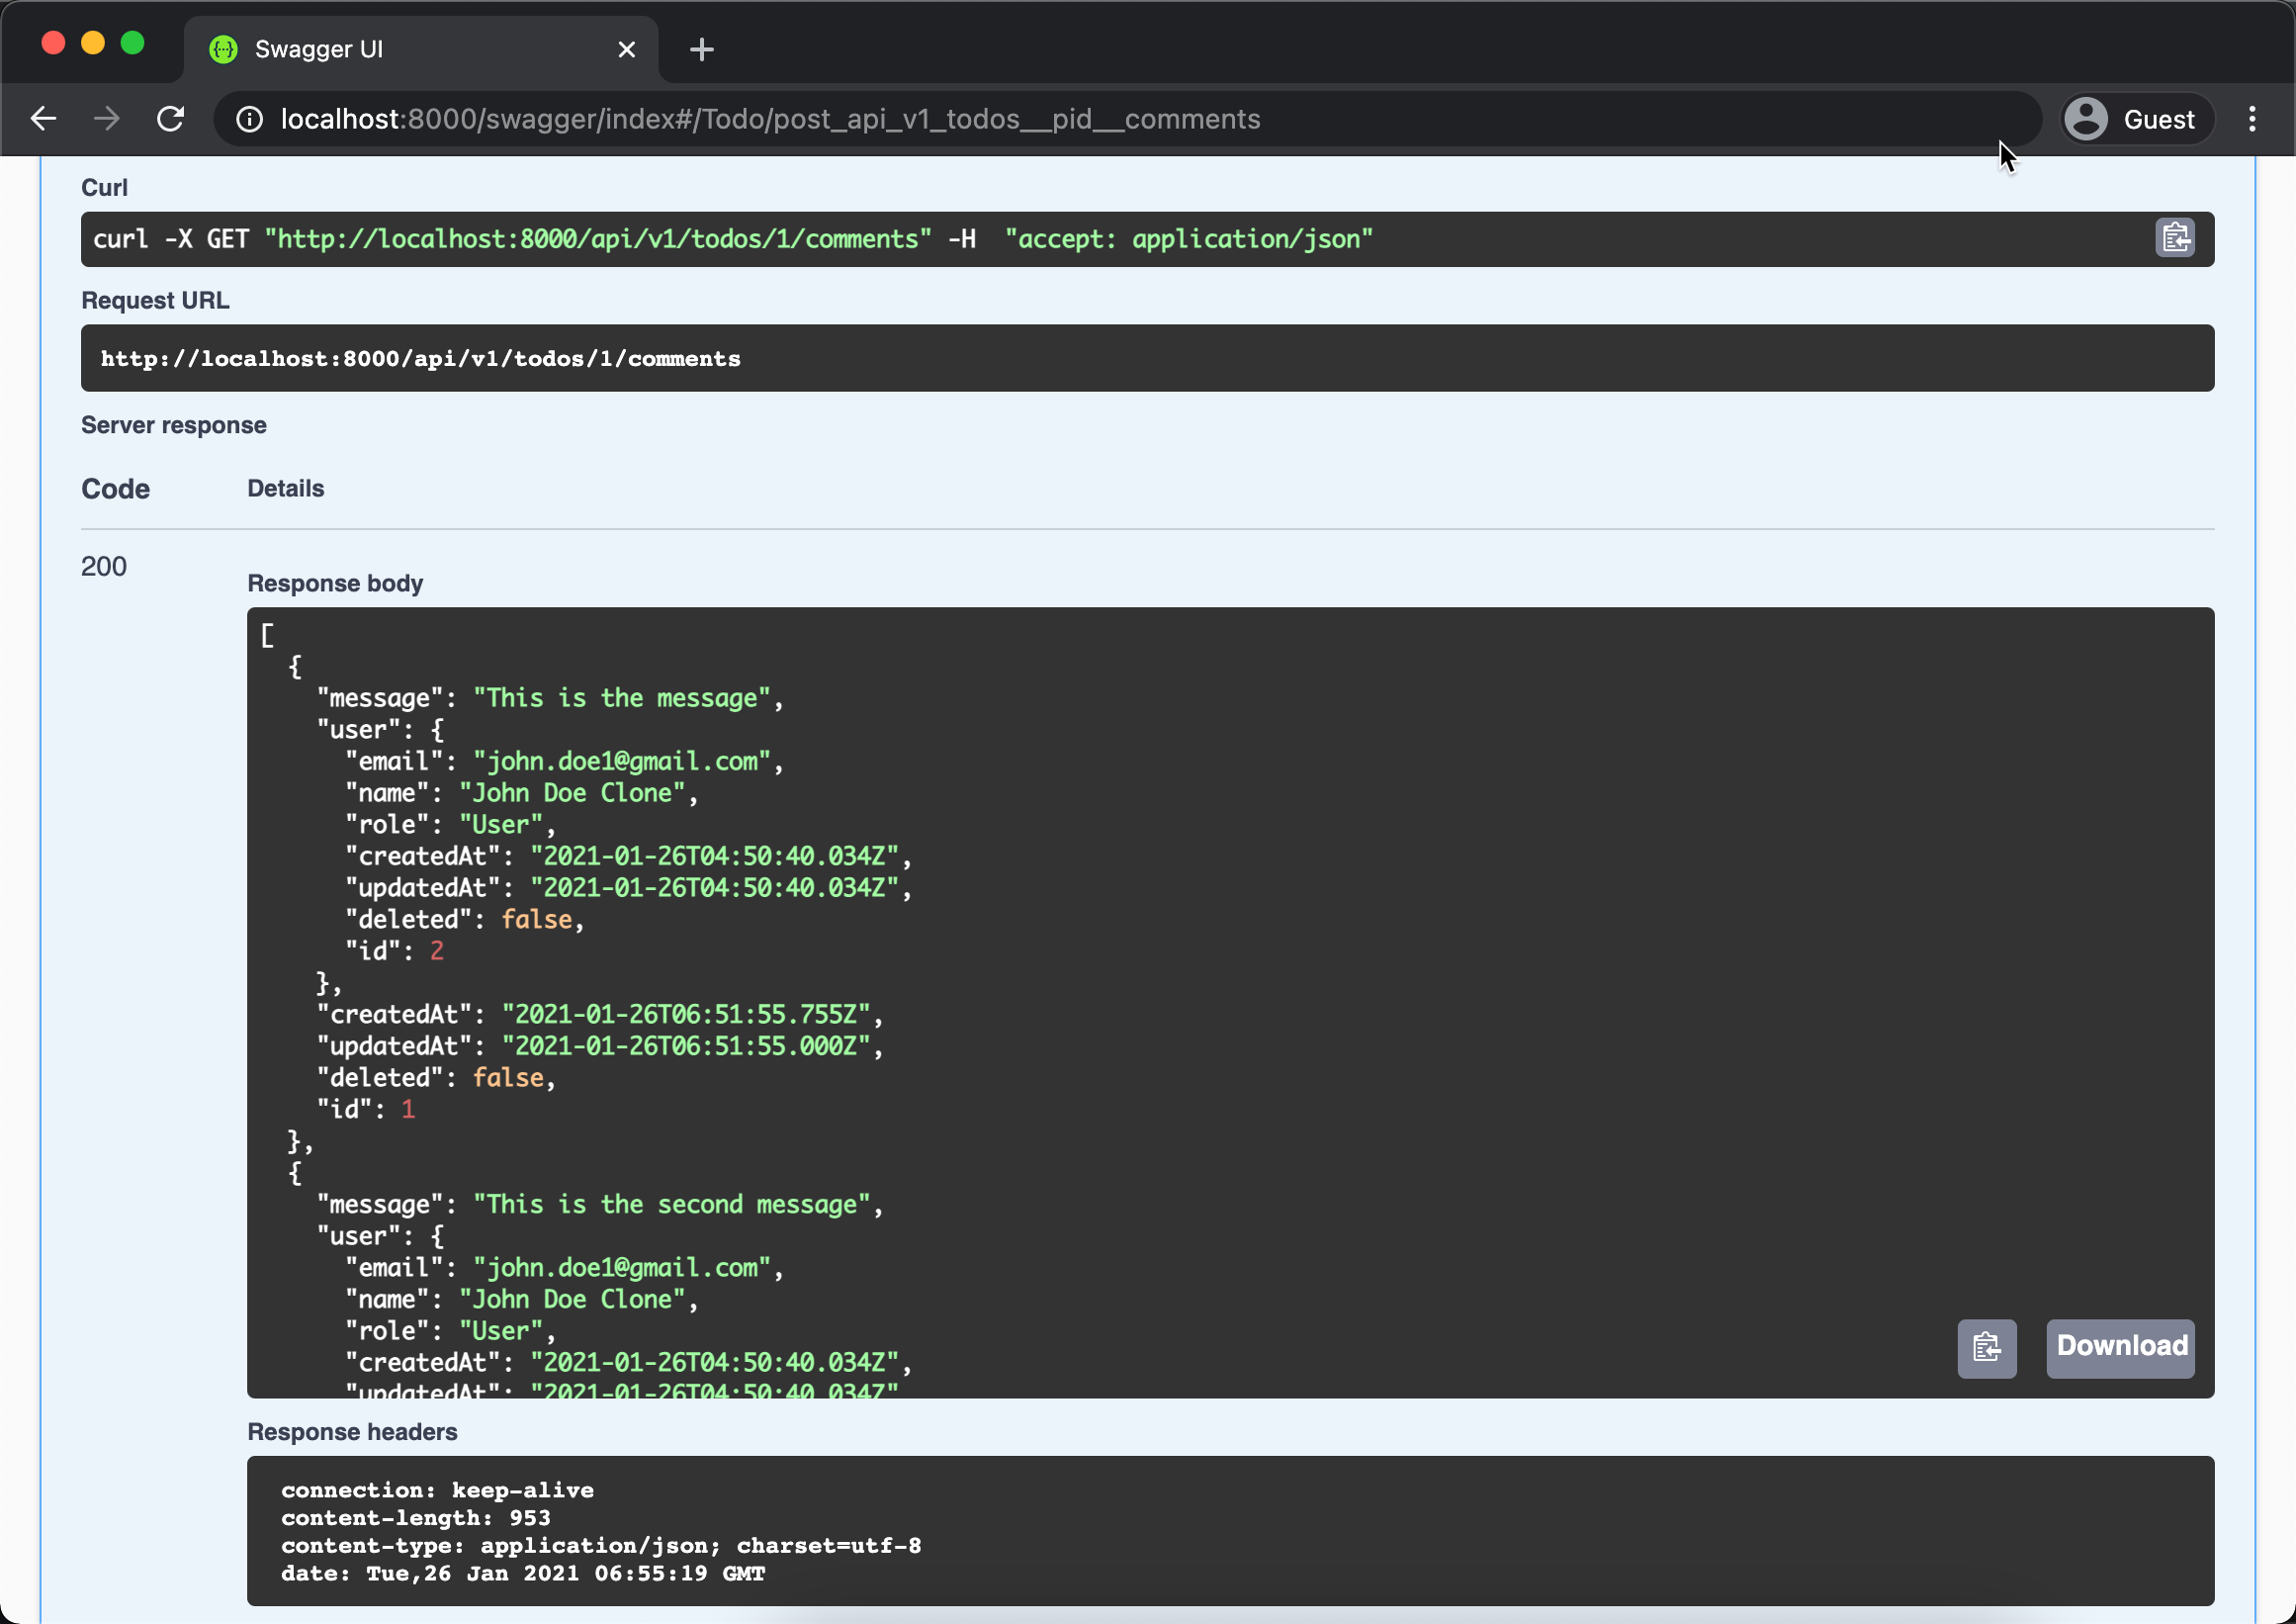
Try experimenting with filter and select parameter and see the change reflected in the response result.
Comment Resource Owner#
The last step, we need to define ResourceOwner for the Comment entity, the step is exactly the same like before. Create a new file named comment-policy.ts then copy paste code below.
Code above is mostly the same as before. We can test our auth policy by using other user to delete the comment like picture below.
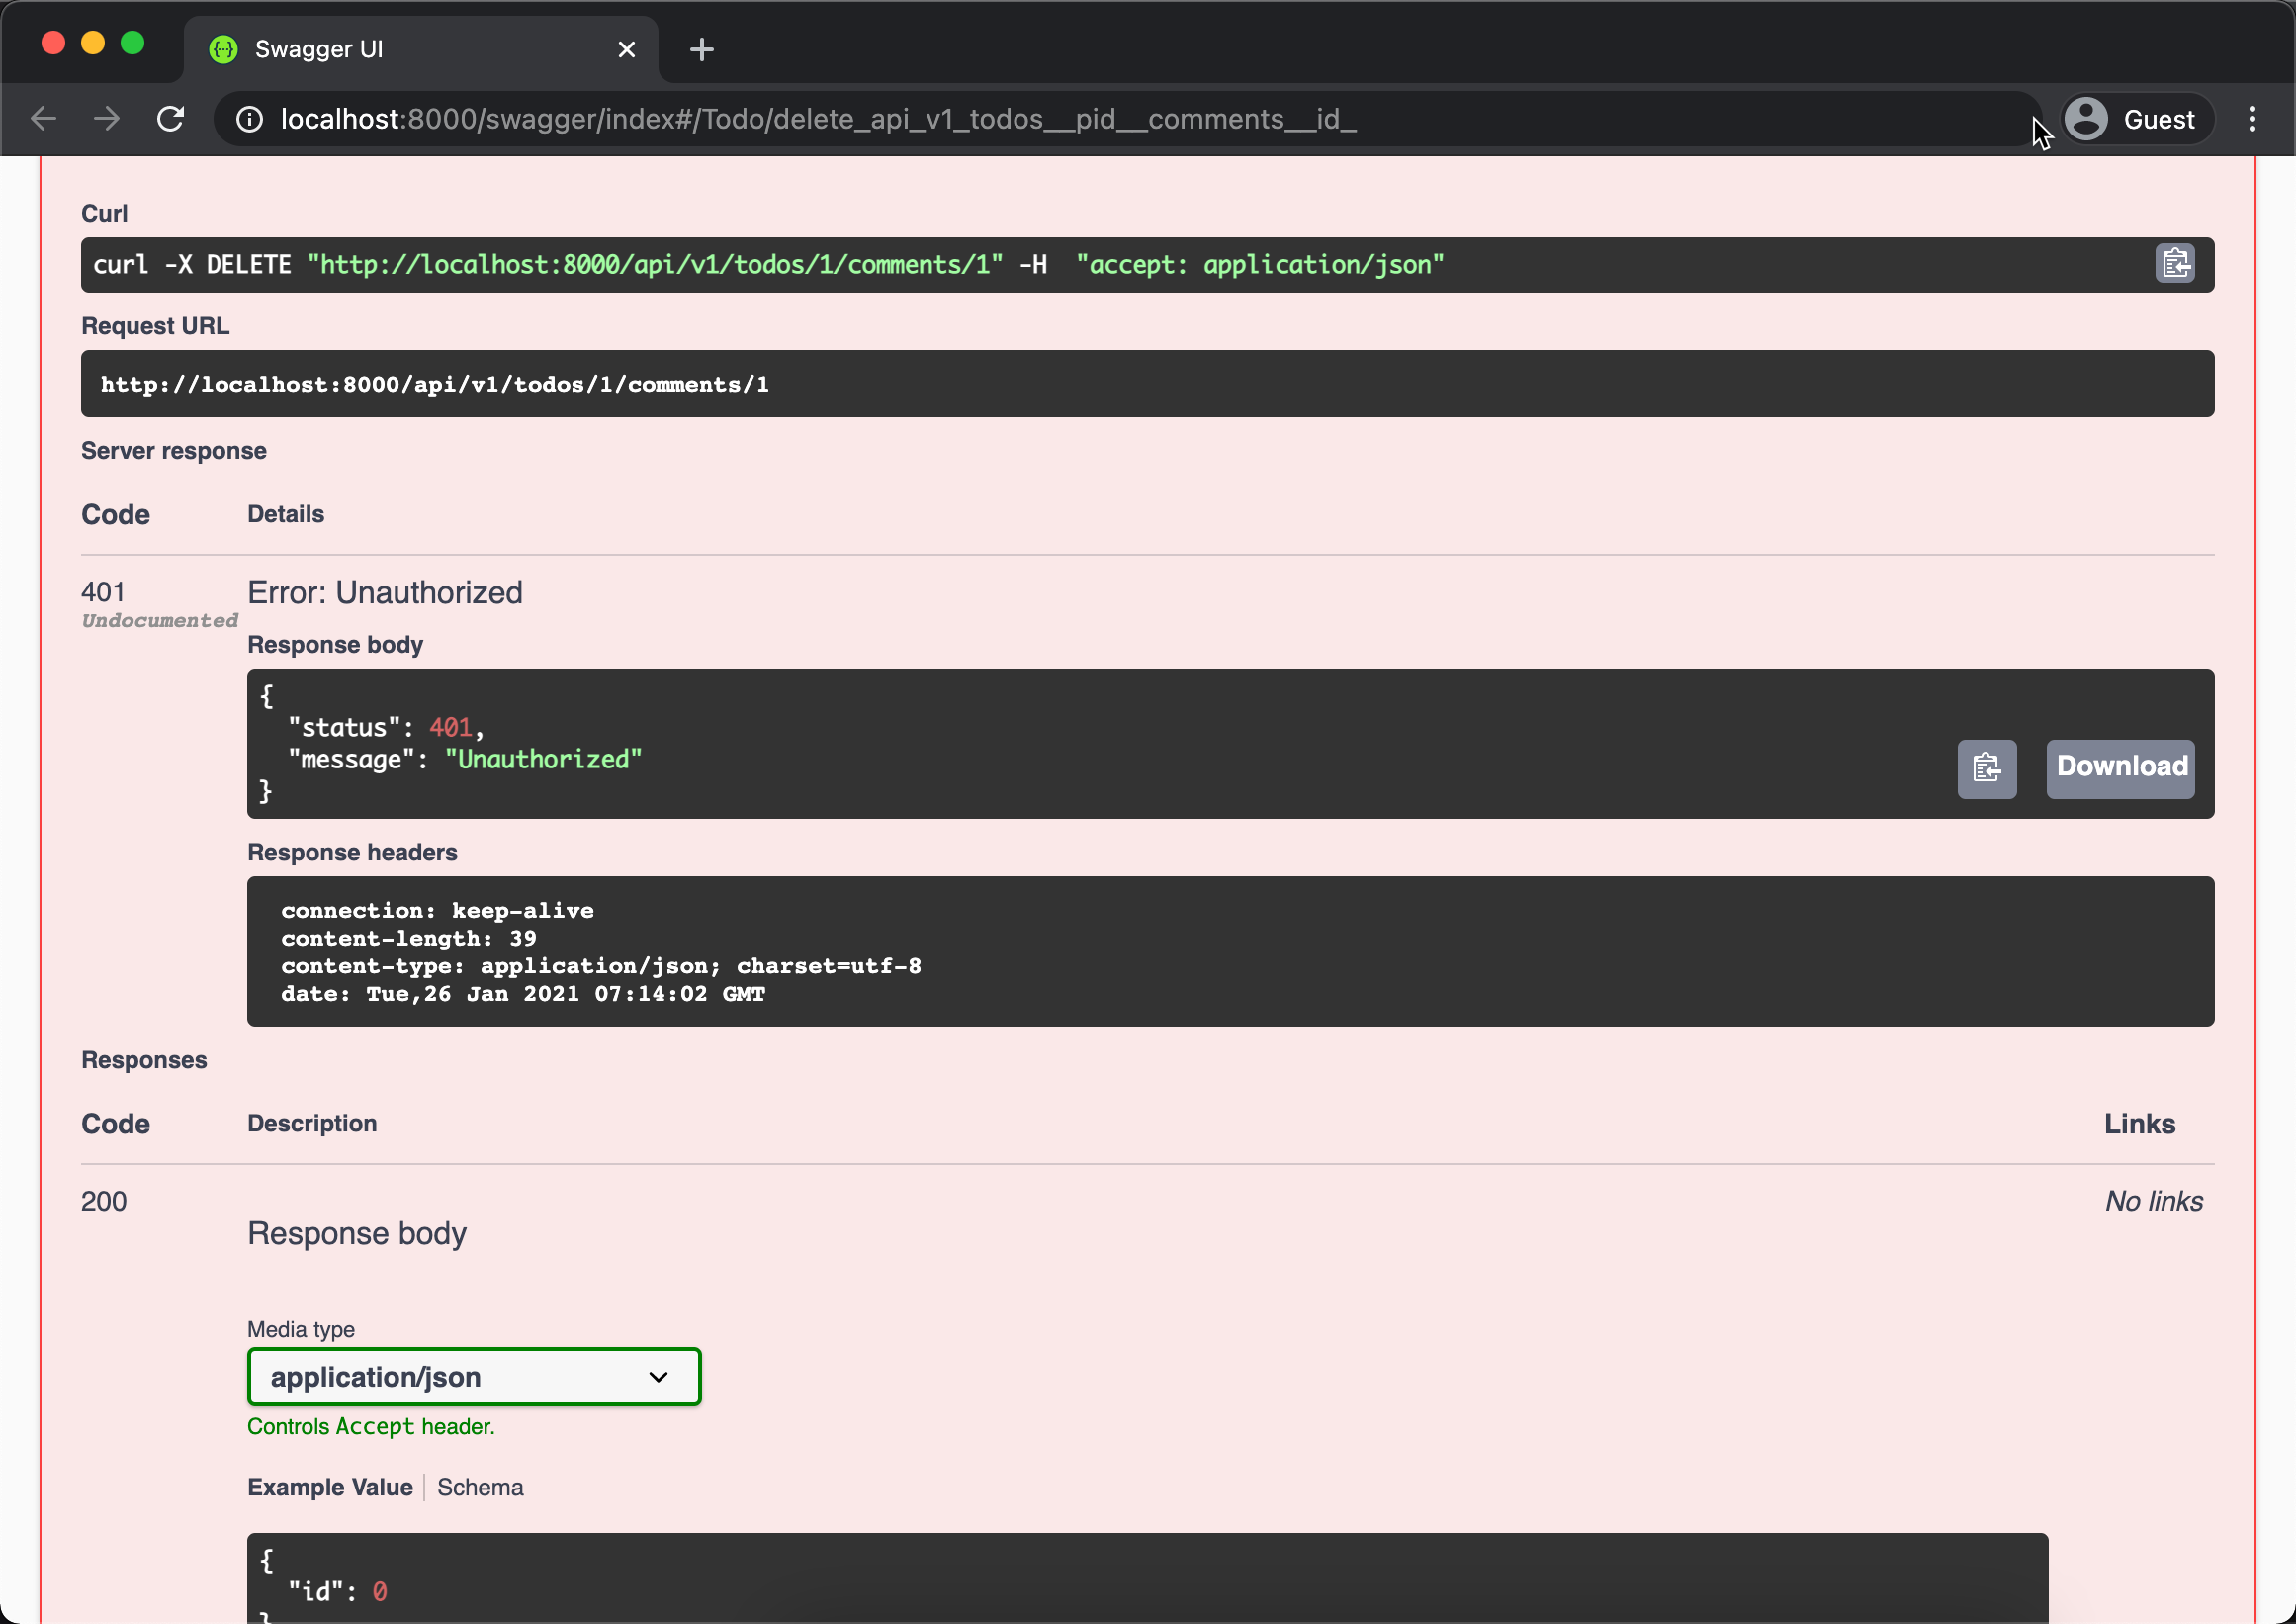
Above showing that other user failed to delete the comment by returned 401. You can play around with other API and see how the its reflect in the response.
Thats it! this is the end of the get started tutorial, don't forget that Plumier has more feature for you to explore.