
Plumier in Five Minutes
Plumier is A TypeScript backend framework focuses on development productivity to help you create a robust, secure and fast Node.js restful API delightfully. Plumier shipped with some built-in feature to speed up your API development.
First Class Entity#
A first class entity is an ORM Entity with control to most framework functionalities (validation, authorization, data type schema, generated restful API). On the background Plumier creates a generic controller on the fly for each first class entity to create CRUD restful API for each entity.
Simplest First Class Entity#
Plumier supported TypeORM entity to be used as first class entity, simplest implementation of first class entity is like below.
Above code generated into six restful routes like below.
| Method | Path | Description |
|---|---|---|
| POST | /items | Create new item |
| GET | /items | Get list of items with paging, filter, order and projection |
| GET | /items/:id | Get single item by id with projection |
| PUT | /items/:id | Replace item by id |
| PATCH | /items/:id | Modify item by id (required validation ignored) |
| DELETE | /items/:id | Delete item by id |
Nested Restful API#
ORM entities may contains relations to represent join to another table, Plumier provided nested generic controller to perform parent children operation.
Above code showing that the relation property comments marked with @genericController() decorators. It tells Plumier to create a nested generic controller to perform parent children operation. Above code will generated into routes below.
| Method | Path | Description |
|---|---|---|
| POST | /posts/:pid/comments | Create new post's comment |
| GET | /posts/:pid/comments | Get list of post's comments with paging, filter, order and projection |
| GET | /posts/:pid/comments/:id | Get single post's comment by id with projection |
| PUT | /posts/:pid/comments/:id | Replace post's comment by id |
| PATCH | /posts/:pid/comments/:id | Modify post's comment property by id |
| DELETE | /posts/:pid/comments/:id | Delete post's comment by id |
First Class Entity Security#
Entities may contains properties that sensitive to some type of users, you may need to restrict user to access specific API endpoint or even you may need to restrict user to set/see specific property on request or response body.
Plumier provided declarative authorization by specifying authorization policy name that can be applied to secure API endpoints, property of request/response body etc. Furthermore you define the authorization policy logic separately.
Code above showing that Supervisor and Staff is an authorization policy. Next you define your authorization policy logic using authorization policy builder like below.
You register the authorization policy by providing the policy name and an authorization callback. The callback will be called during authorization evaluation.
Auto Generated Values#
Entities may contains properties that is auto generated, such as createdBy property that needs to automatically assigned with the current login user ID.
Furthermore you may need to restrict anyone to set the createdBy property from the request body.
Code above showing that we use the request hook @preSave() to make the assignUser method executed before the entity being saved to the database.
Define Filterable Fields#
Generic controller provided functionalities to refine the API response, such as filter, paging, order and projection.
Using above code we can query filter for all Post fields. Using above generated API you may request like below.
Filter will follows the @authorize.read() and @authorize.writeonly() respectively. Its mean when user doesn't have proper read access the query will returned 401.
documentation
For more information about first class entity and generic controller can be found here
Validators#
Plumier provided comprehensive list of validator, uses ValidatorJS internally. You specify validation using @val decorator.
There are more than 40 validators to use to secure your API consumer request.
documentation
Refer to validator documentation for more information
Common Controller#
Generic controller is just an implementation of Plumier controller with generic class signature. Even though generic controller can be fully customized to match your app requirements, in some case its may required to use a controller manually to handle user request.
The term of Controller in Plumier is the same as in other MVC framework. Plumier controller is a plain class end with Controller for example class UsersController. A route automatically generated based on /controller/action. This behavior can be customized using @route decorator.
Controller can return any value including Promise, this value then rendered into JSON response automatically. You can have more control to the response by returning the ActionResult or use the built-in response function.
| Action | Alias | Description | Package |
|---|---|---|---|
ActionResult | response.json() | Return json response | plumier |
RedirectActionResult | response.redirect() | Redirect response | plumier |
FileActionResult | response.file() | Serve static file response | @plumier/serve-static |
Bind Request Part Into Action's Parameter#
Action parameter can be bound into request part such as query, body, header etc. Request values received automatically converted into data type match with action parameter data type.
Above controller generated into GET /users/list?limit&offset&active. All parameters are optional with their default values. Note that the value automatically converted match with parameter data type, giving these request are valid
Important to notice that boolean parameter can be filled with: yes, no, true, false, 1, 0. And parameter of type datetime can be filled with 2020-12-31 or 2020-10-05T23:28:33.598Z
Parameters also can be bound with request body by providing a parameter of type of custom object to hold the request body like example below
Above controller will be generated into POST /auth/login with request body { "email":<string>, "password": <string> }
Plumier provided decorators to bind specific request body to parameter, you can use the @bind decorator on specific parameter.
Here are list of supported parameter binding decorators
| Binding | Description |
|---|---|
@bind.user() | Bind current login user (JWT claims) into parameter |
@bind.ctx() | Bind request context into parameter |
@bind.request() | Bind request into parameter |
@bind.body() | Bind request body into parameter (optional, or use a custom class type to automatically bind request body to parameter) |
@bind.query() | Bind request query into parameter |
@bind.header() | Bind request header into parameter |
@bind.cookie() | Bind request cookie into parameter |
@bind.custom() | Bind custom parameter binding implementation into parameter |
documentation
Refer to the complete documentation about controller
Open API 3.0#
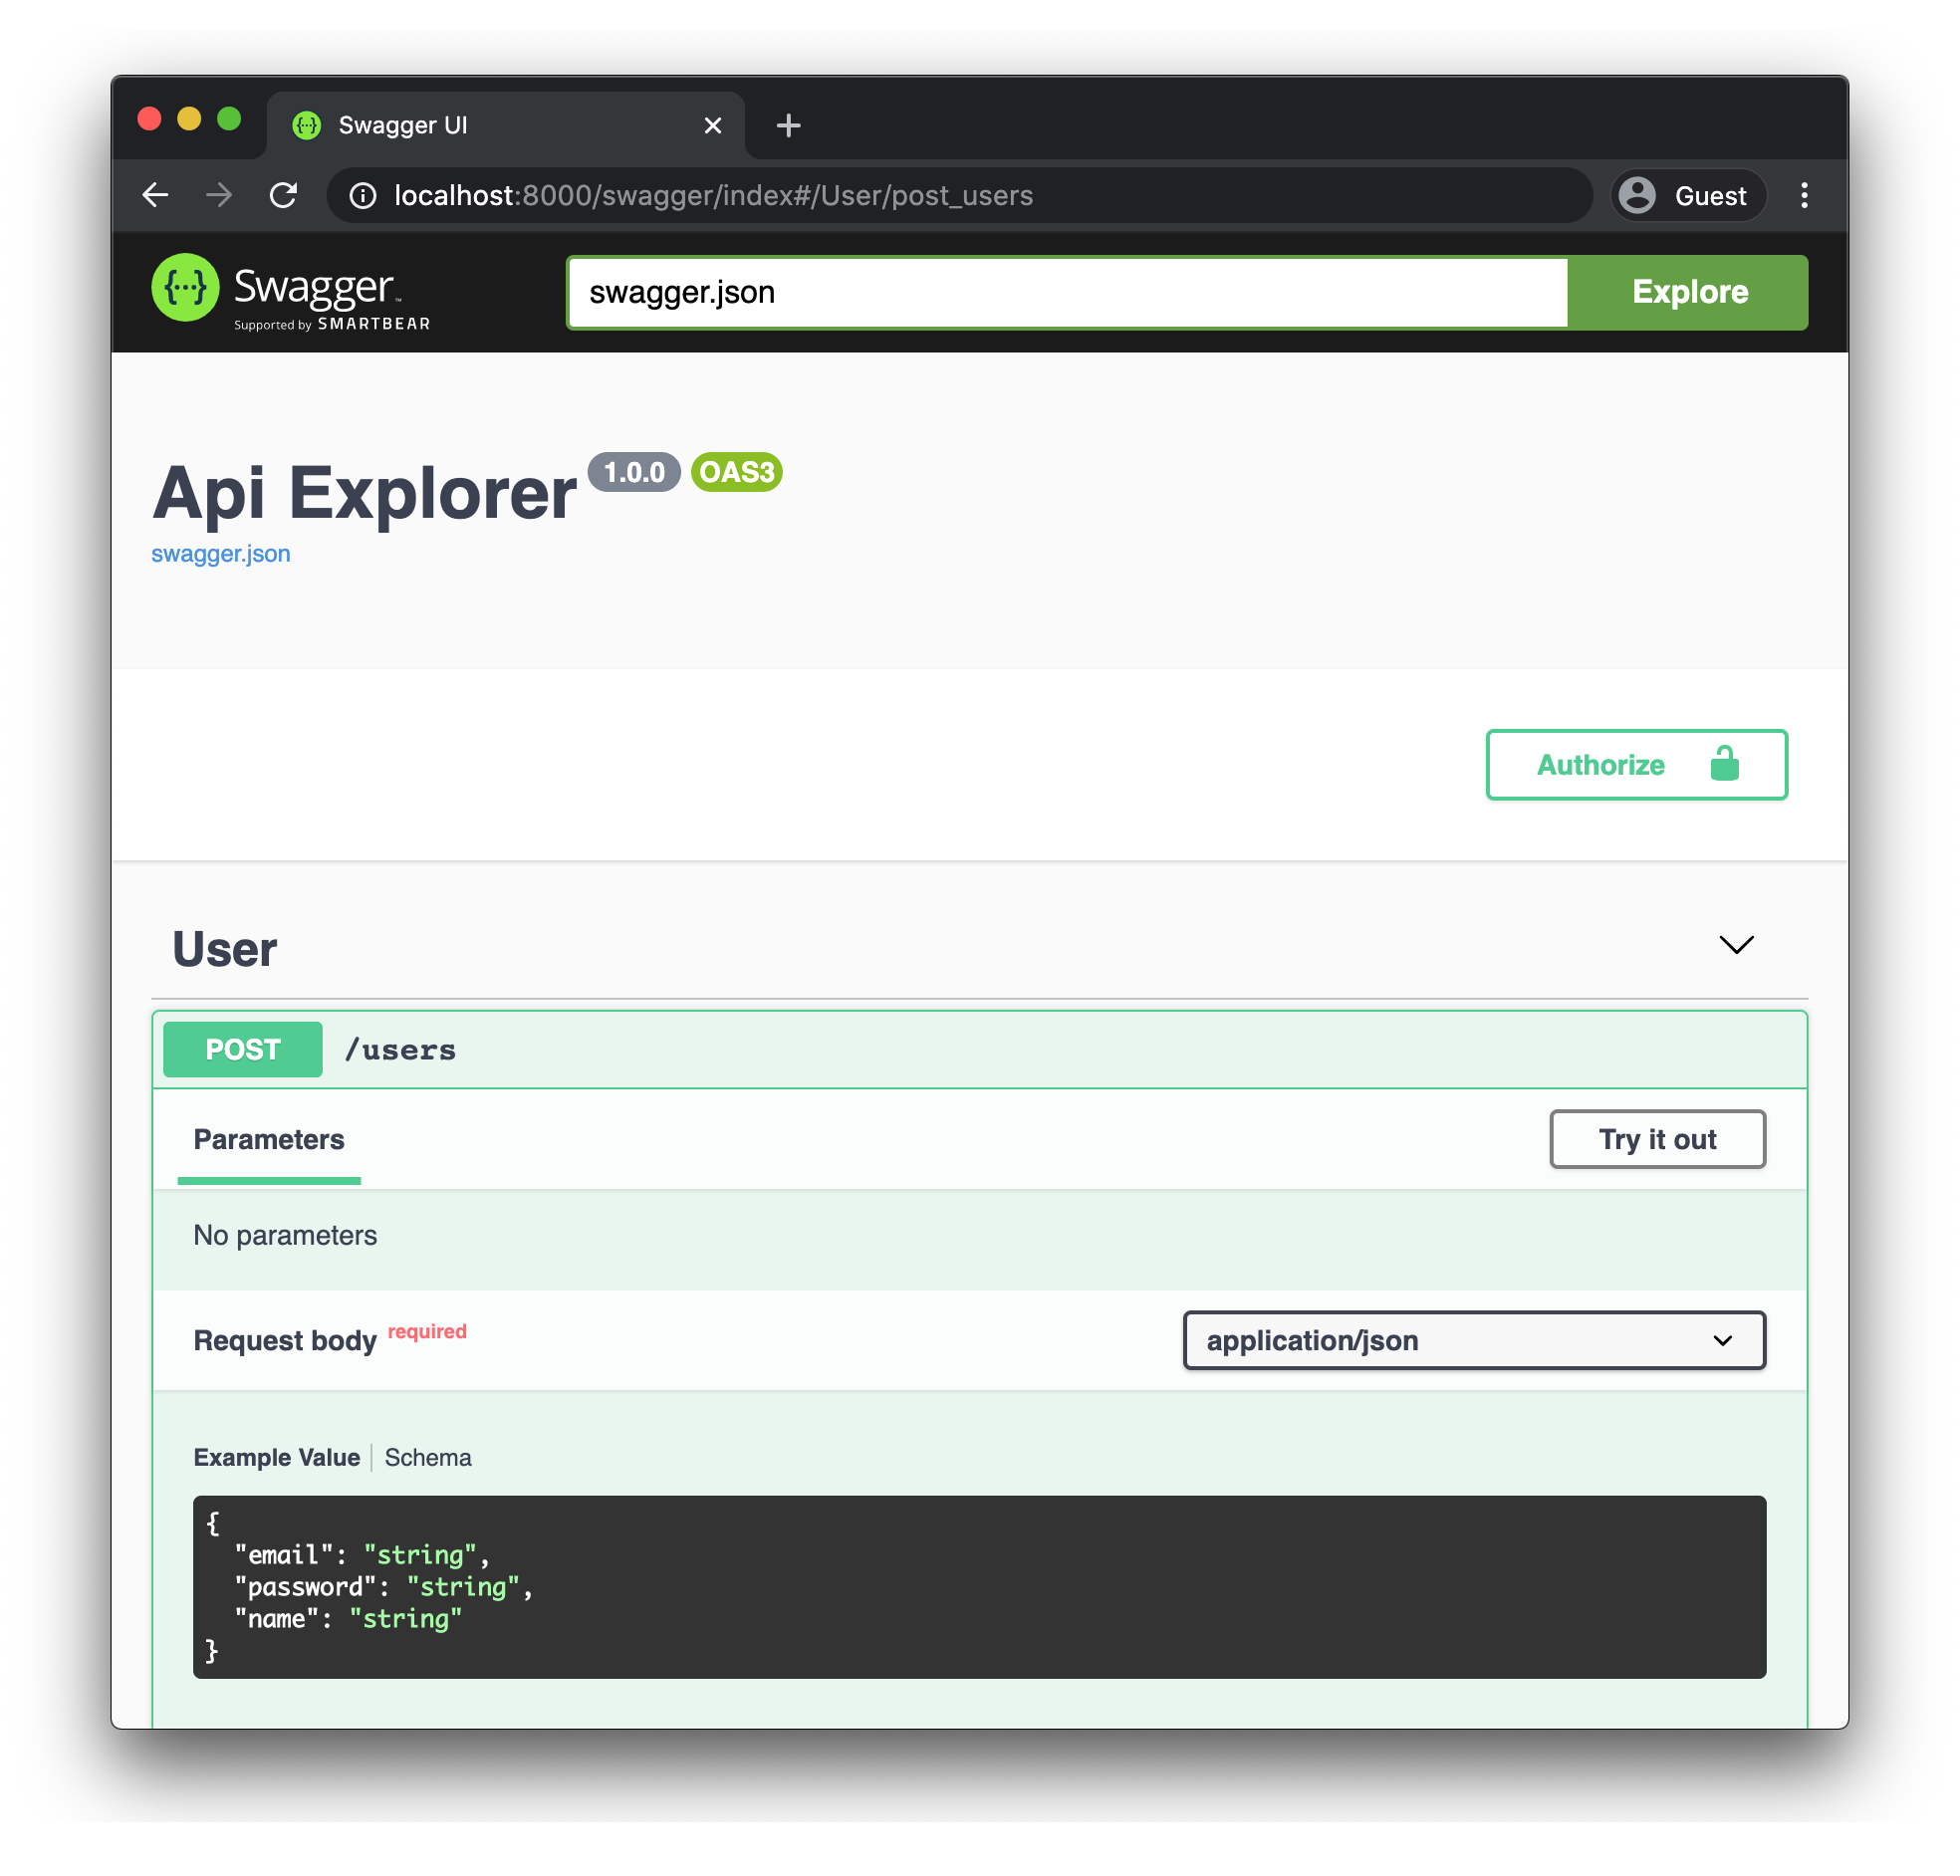
Plumier provided SwaggerFacility to automatically generate Open API 3.0 schema from both controller and generic controller. Open API 3.0 Schema automatically generated by reading and transforming controller's metadata on the fly.
The generated Open API 3.0 schema can be customized minimally, but mostly everything will just work out of the box. SwaggerFacility hosts the SwaggerUI under /swagger endpoint.
Facilities#
The entry point of Plumier application is an instance of Plumier. Plumier consist of features that can be enabled/disabled by installing Facility.
Above code will start Plumier application with some installed features and listens to the port 8000. Plumier provided some facilities for development convenient they are:
| Facility | Includes | Package |
|---|---|---|
WebApiFacility | Body parser, CORS middleware, Default dependency resolver | plumier |
RestApiFacility | Same as WebApiFacility except its provided more strict restful API status code | plumier |
ControllerFacility | Host controllers by path or type, furthermore controllers can be grouped and versioned | plumier |
LoggerFacility | Simple request logging and error reporting | plumier |
JwtAuthFacility | Jwt middleware, Enable authorization, Jwt Secret configuration | @plumier/jwt |
MongooseFacility | Mongoose schema generator, generic controller and connection management | @plumier/mongoose |
TypeORMFacility | Provided helper and generic controller for TypeORM | @plumier/typeorm |
ServeStaticFacility | Serve static files middleware | @plumier/serve-static |
SwaggerFacility | Serve Swagger UI and generate Open API 3.0 automatically | @plumier/swagger |
Code Style#
Plumier doesn't strictly provided the project layout, but it provided flexibility to layout your project files match your need. Below are some common project structure usually used by developers, You can choose any of them match your like.
Single File Style#
This style usually used by Express for small app with a fewer code. Put all controllers and entities in a single file and configure the bootstrap application like below.
Classic MVC Style#
This is default style supported by Plumier. Classic MVC style app separate project files by functionalities such as controllers, models, repositories, entities, services etc.
No more setup required to use this style.
Modular Style#
This style usually used by modern frameworks, files separated by module per directory, each directory consist of controller, model, service, entity etc separated in different files.
To use this style you must follow the file name convention by creating file ends with controller word like below.
No more setup required to use this style, Plumier will automatically search through all files to find controllers.